
Before disassembling, remove the starter from the motorcycle (see «Starter - removal and installation»).
Disassembly
1. Using a 7 mm wrench, unscrew the two bolts of the starter housing.

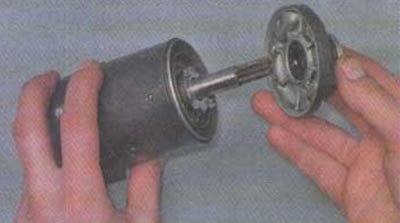
2. Remove the starter front cover. sliding it along the shaft.
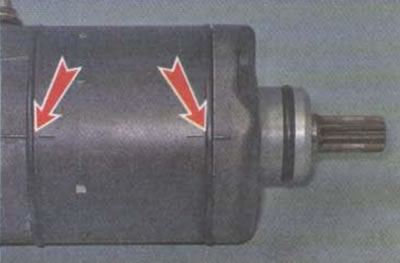
3. It should be noted that there are marks on the starter housing and on both covers for proper assembly.
4. Remove the spacer washer from the rotor shaft.

5. Remove the rotor from the starter housing.

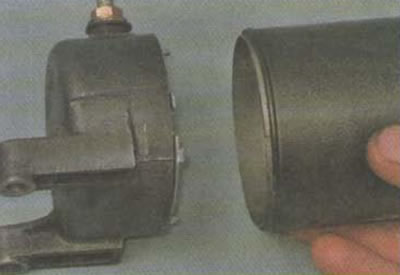
6. Disconnect the back cover from the starter housing.
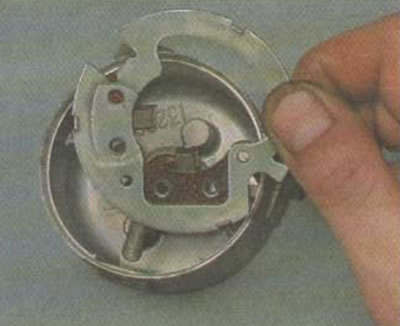
7. Using a 10 mm wrench, unscrew the nut from the starter terminal located on the back cover.

8. Remove the brush assembly from the cover.
The most common malfunctions that happen with starters are wear or jamming of the brushes. As a rule, the problem is solved by the usual cleaning of the brushes and the rotor from wear products. Repair of the rotor is difficult to perform in a garage, therefore, in the event of a malfunction, it is recommended to replace the starter assembly.
Assembly
We assemble the starter in the reverse order, apply grease to the ends of the rotor shaft.
When assembling, it is necessary to combine the marks on the covers and the starter housing. After assembly, we check the performance of the starter (see «Diagnostics of the engine start system»).
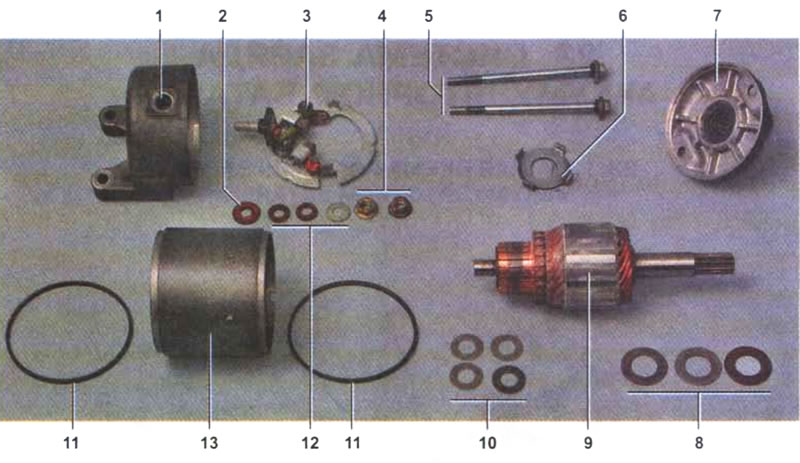
Starter details: 1 - back cover; 2 - washer; 3 - brush assembly; 4 - terminal nuts; 5 - body bolts; 6 - lock washer; 7 - front cover; 8 - adjusting washers; 9 - rotor; 10 - washers; 11 - sealing rings; 12 - terminal washers; 13 - building (stator)