
Check the condition of the oil pump parts. If at least one of the specified parameters is out of range, the oil pump must be replaced as an assembly, since all parts of the pump are matched to each other at the factory, it is not allowed to replace them individually.
1. Using a Phillips screwdriver, unscrew the two screws securing the oil pump cover.
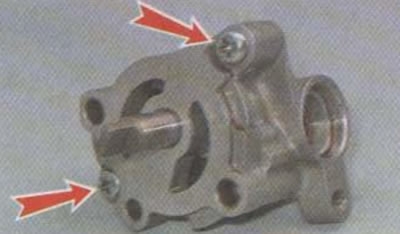
2. Shoot cover.
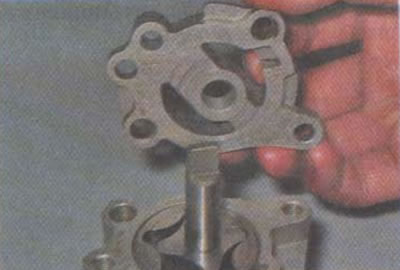
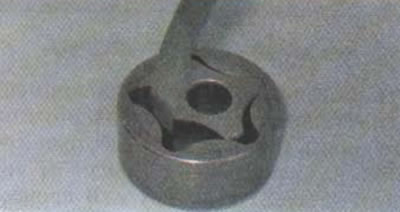
3. Remove the driven rotor.
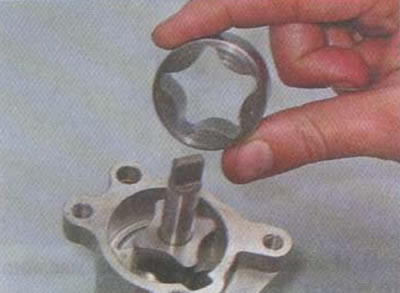
4. Remove the main rotor from the shaft.

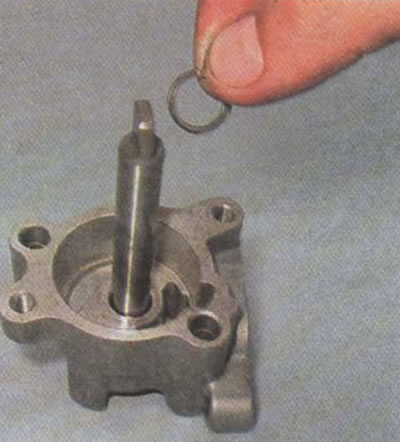
5. We remove the pin of the leading rotor from the hole in the shaft.

6. Remove the main rotor spacer from the shaft.
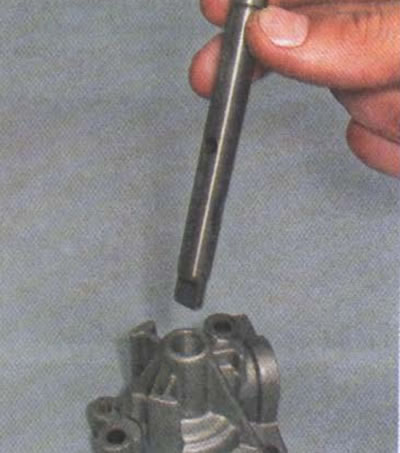
7. Remove the shaft from the oil pump housing.
8. We wash all the parts in gasoline and inspect them. If they have mechanical damage, chips, cracks, signs of corrosion, the pump must be replaced. If deep scratches are visible on the sliding planes of the parts, it is also recommended to replace the oil pump.
Limit clearances between the rotors of the oil pump
| Radial (between the lugs of the rotors), mm | 0,1 |
| Radial between driven rotor and housing, mm | 0,15-0,22 |
| end (between rotors), mm | 0,02-0,07 |
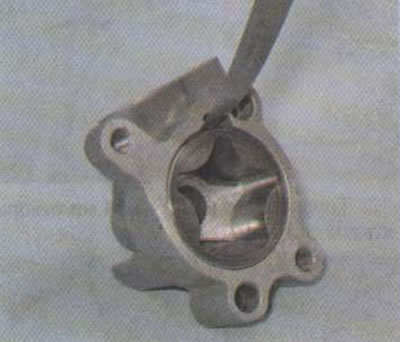
9. Using a flat feeler gauge, measure the radial clearance between the rotor protrusions. The gap should not exceed 0.1 mm.
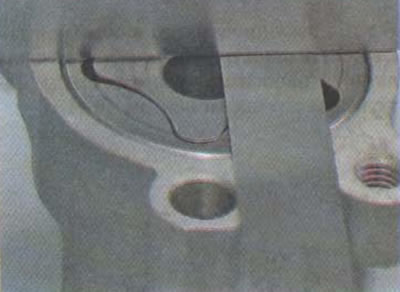
10. We measure the radial clearance between the driven rotor and the pump housing. The gap should be within 0.15-0.22 mm.
11. Install both rotors without a shaft into the housing. We apply a metal ruler edgewise to the plane of the housing and measure the gaps between it and the rotor one by one. For convenience, you can measure the gaps by installing the rotors into the housing separately. The difference in the gaps between the ruler and the rotor will be equal to the gap between the rotors.
The gap should be in the range of 0.02-0.07 mm.
12. If at least one of the gaps is outside the specified values, the oil pump must be replaced as an assembly, since all pump parts are matched to each other at the factory and cannot be replaced individually.
13. Before assembly, we blow all parts of the oil pump with compressed air or wipe them with a clean rag or paper to prevent dust and dirt particles from getting between the rubbing surfaces and lubricate them with engine oil.
Attention! The driven rotor must be installed with the side with a knocked out point inside the housing.

14. We assemble the pump in the reverse order. The assembled pump should rotate easily and without binding.