Torque wrench settings:
- Brake caliper mounting bolts (1): 22 Nm (2.2 kg·m)
Place the motorcycle on the rear wheel stand (OPT); see 1.7.2.
Remove the air scoop; see 7.1.17.
Connect the slings to the holes on the outside of the frame.
Lift the hoist arm until stretching the slings taut.
Remove the mudguard; see 7.1.10.

Release and remove the two mounting bolts (1) of the front brake caliper.
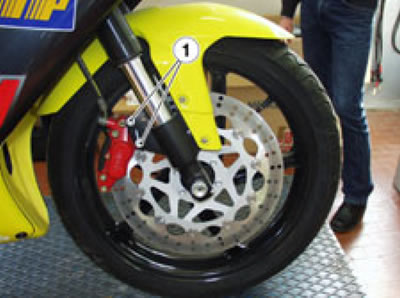
Remove the caliper from the disc but leave it attached to the hose.
Warning! Do not operate the front brake lever with the brake caliper removed, or the brake caliper pistons might fall out leading to loss of brake fluid. The front end is heavy. An assistant will be required to support it. When working with an assistant, plan the whole procedure carefully together.
While the assistant holds the front end steady, unscrew and remove the adjusting ring nut and perform the first five operations described at paragraph 2.16.1.
Raise the hoist arm until lifting the front end clear of the steering tube.
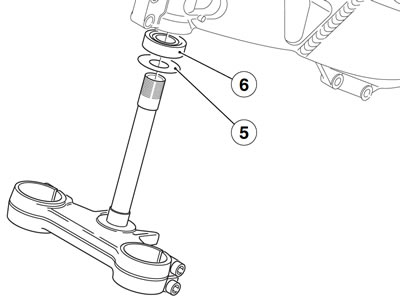
Collect the following parts in the order:
- Oil seal (2);
- Washer (3);
Remove the ball bearing (4) using a suitable extractor.

- Bottom dust seal (5).
Remove the roller bearing (6) using a suitable extractor.