Removing and installing number-plate carrier
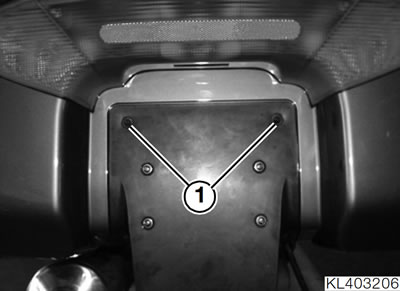
- Remove the number plate, if applicable.
- Remove 2 screws (1) securing the number plate carrier.
- Tilt the number plate carrier to disengage.
- Installation is the reverse of the removal procedure: pay particular attention to the following.
Removing and installing top case
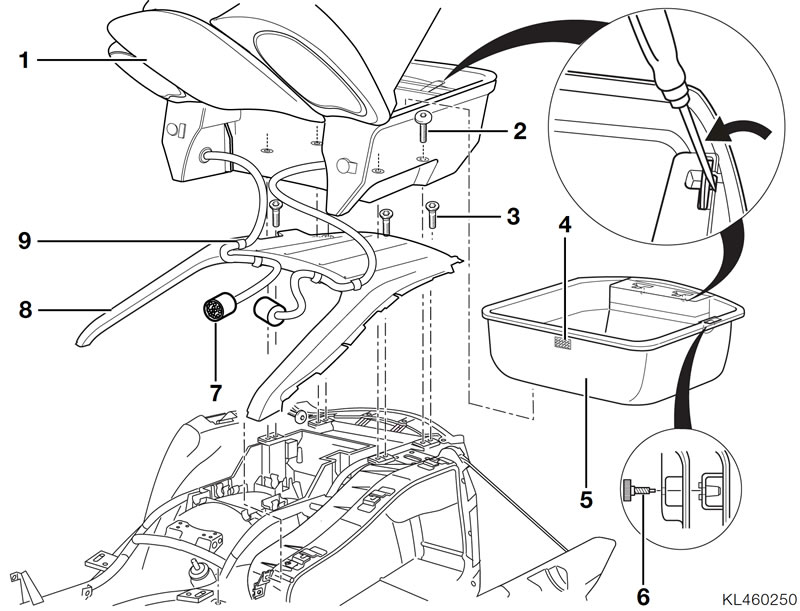
- Remove rear seat.
- Disconnect plugs (7) and disengage the cables from their holders (9).
- Open the top case.
Warning: Support the lid to prevent it falling closed.
- Support the lid (1).
- Release the knurled screw (6).
- Disengage the strap from the base of the top case.
- Use a screwdriver to unclip the removable lining (5) from the lock.
- Detach the Velcro strip (4) from the rear panel.
- Remove the lining.
- Release fasteners (2) and remove the top case.
- Installation is the reverse of the removal procedure: pay particular attention to the following.
Note: The backrest can be adjusted by shifting the top case to either the forward or back position.
- Adjust by swapping the anchorages for cover of rear carrier (8) and top case.
- Always use the long screws (2) to secure the top case.
Additional instructions for moving the backrest
- Remove four screws (3) for cover of rear carrier (8).
- Move the four screws (3) for the rear carrier cover forwards.
- Use long fasteners (2) to secure the top case in its new position.
Tightening torque:
- Top case to rear frame — 9 Nm
- Rear carrier to frame — 9 Nm
- Rear seat to frame — 9 Nm
Disassembling top case
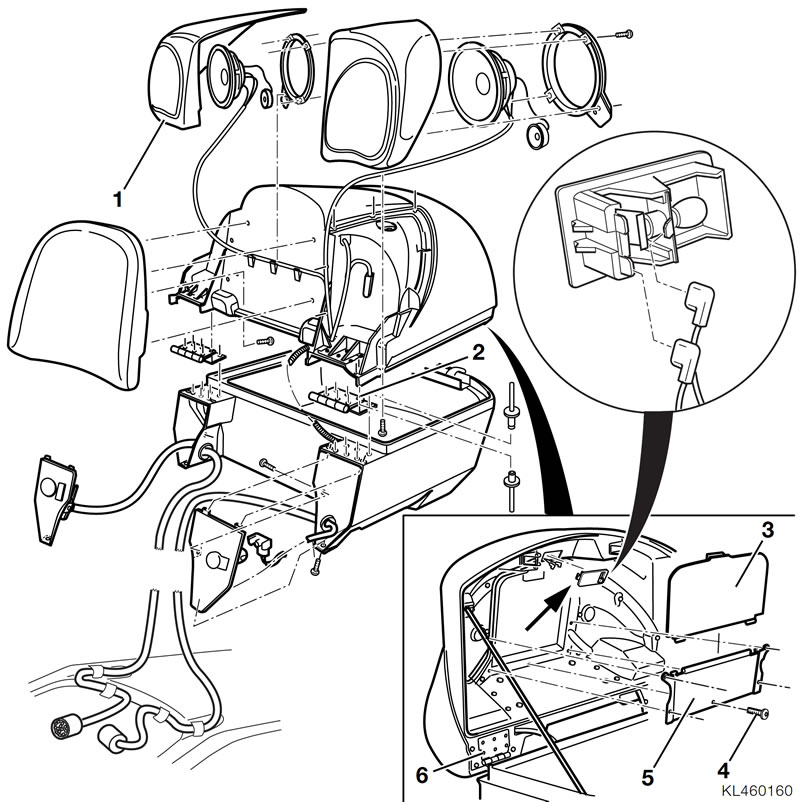
Removing/installing interior light
- From the left (arrow), unclip the light.
- Disconnect plug.
- Installation is the reverse of the removal procedure.
Removing mirror and document stowage compartment
- Remove 5 fasteners (4) and remove document stowage compartment (5) complete with mirror (3).
- Installation is the reverse of the removal procedure.
Removing lid of top case
- Remove the top case.
- Remove the backrest.
- Remove left and right armrests (1).
Removing rear speakers
- Remove the interior light.
- Remove cable for interior light from lid of top case.
- Drill out rivets (6).
- Remove lid of top case.
- Remove shanks of rivets and metal chips.
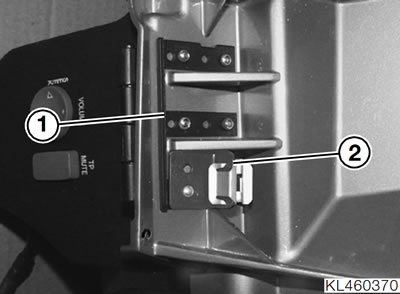
Note: Install plate with holes (1) as seat for rivet heads. Install retaining clip (2) for cable as illustrated, together with plate (1).
- Use A4.0X12 pop rivets to secure the lid of the top case to the hinges.
- From this point on, installation is the reverse of the removal procedure.
Tightening torque:
- Armrest to top case — 1 Nm
Removing base of top case
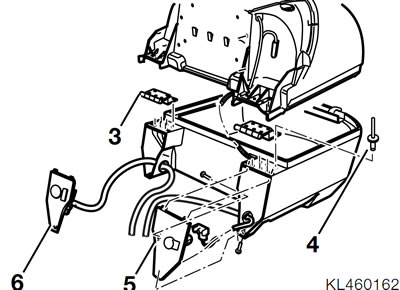
- Remove the top case.
- Remove rear radio remote control unit (6).
See Group 65.
- Remove the power socket from the top case together with support (5) and pull cable out of top case.
See Group 61.
- Drill out rivets in base of top case.
- Remove base of top case.
- Remove shanks of rivets and metal chips.
- Use A4.0X12 pop rivets (4) to secure the base of the top case to the hinges (3).
- From this point on, installation is the reverse of the removal procedure.
Removing and installing rear carrier cover
- Remove the top case.
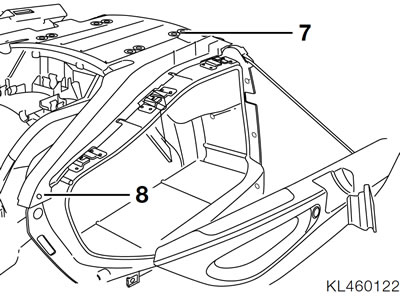
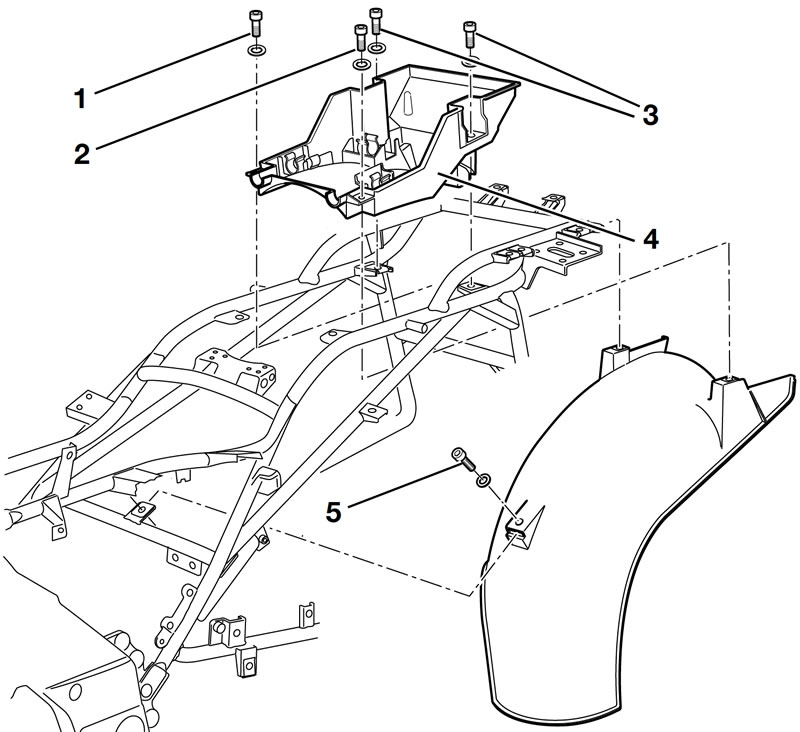
- Take out screws (7, 8).
- Remove the rear carrier cover.
- Installation is the reverse of the removal procedure.
Tightening torques:
- Rear carrier cover to rear frame, top — 9 Nm
- Rear carrier cover to case — 1 Nm
Removing and installing case trimmer
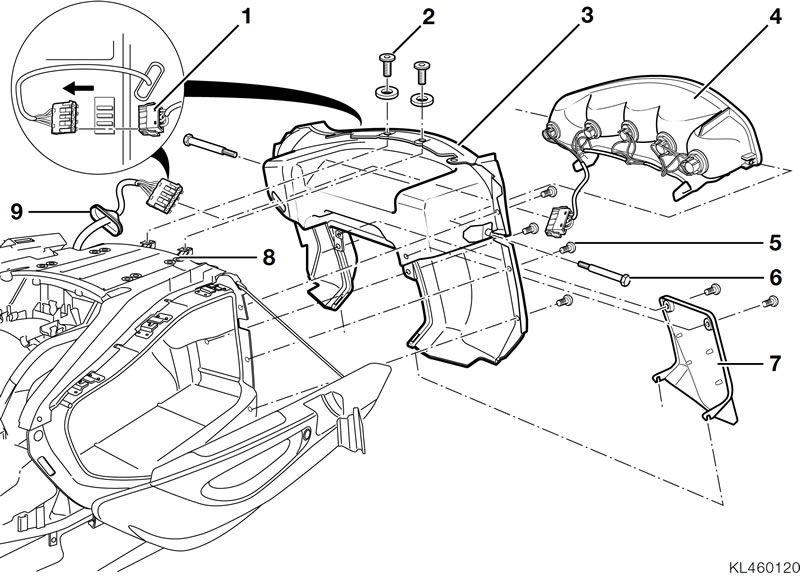
- Remove the top case.
- Remove the rear carrier cover (8).
- Remove number plate carrier (7).
- Release fasteners (6) and remove rear light (4).
- Disconnect plug (1).
- Pull cable with rubber grommet (9) out of case trimmer.
- Release fasteners (2, 5) and remove case trimmer.
- Installation is the reverse of the removal procedure.
Tightening torques:
- Case trimmer to rear frame (2) — 5 Nm
- Case trimmer to case (5) — 2 Nm
- Rear carrier cover to rear frame, top — 9 Nm
- Rear carrier cover to case — 1 Nm
- Top case to rear frame — 9 Nm
- Rear seat to frame — 9 Nm
- Rear light cluster to case trimmer — 5 Nm
Removing and installing side case
- Remove the number plate carrier.
- Remove the top case.
- Remove the rear carrier cover.
- Remove the case trimmer.
- [Left]. Disassemble knob for seat latch.
- [Right]. Remove CD player, if applicable.
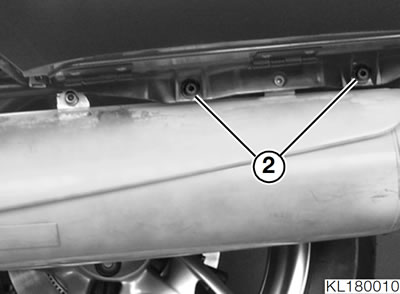
- Slacken right or left rear footrest plate, as applicable.
- Remove fasteners for battery cover (1) on left or right case, as applicable and loosen battery cover.
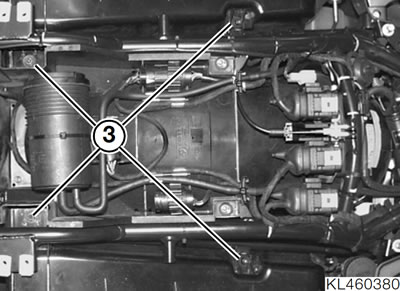
- Remove fasteners (2) securing case to rear frame at bottom.
- Remove fasteners (3) securing case to rear frame at top.
- Remove case.
- Installation is the reverse of the removal procedure.
Tightening torques:
- Case to rear frame M6 — 9 Nm
- Fairing screws — 2 Nm
Removing and installing side case lid
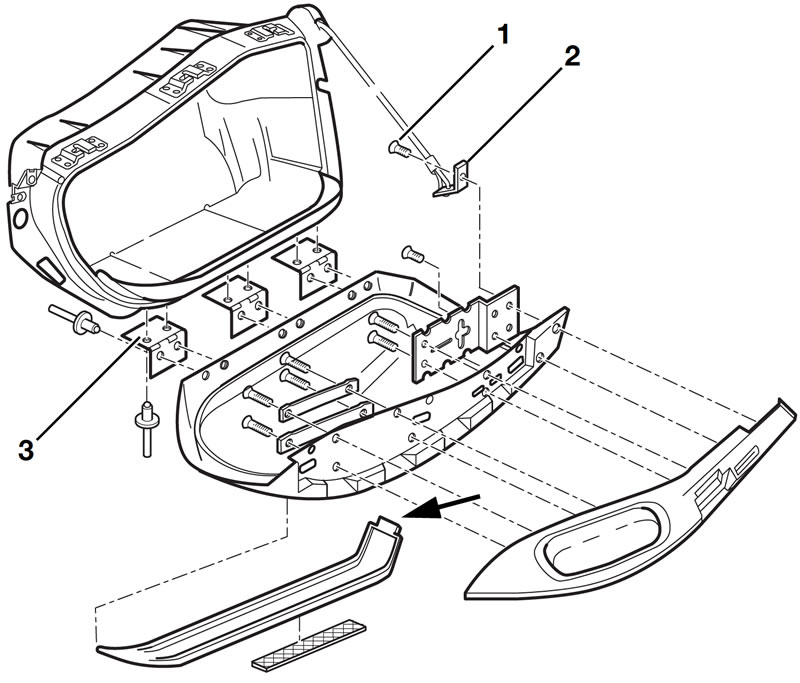
- Drill out rivets.
Warning: The strap winder is spring-loaded: risk of injury if retaining plate (2) is allowed to snap loose.
- Remove fastener (1) securing strap to lid of case.
- Remove lid of case.
- Remove shanks of rivets.
- Use A4.8X16 pop rivets to secure lid to hinges (3).
- Secure strap to lid of case.
Tightening torque:
- Strap to lid of case (1) — 2 Nm (clean thread + Loctite 243)
Removing and installing rear moulding
Caution: Do not overheat plastic parts and pai.
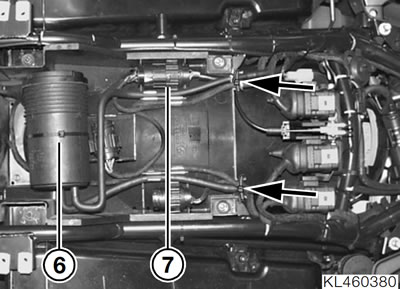
- Open the cable ties (arrows).
- Disconnect plug (7).
- Pull round plugs and cables out of their holders.
- [Activated charcoal filter]. Remove activated charcoal filter (6).
- Release 4 fasteners (1, 2, 3) and remove rear carrier (4).
- Installation is the reverse of the removal procedure.
- Using a hot-air gun, carefully heat the moulding.
- From inside the case lid, press out latch of moulding (arrow).
- Using a blunt tool, carefully pry off the moulding.
- Remove all traces of epoxy adhesive from the case and clean the mating faces.
- Affix new moulding to case with epoxy adhesive.
Removing and installing rear carrier section
- Remove left and right side cases.
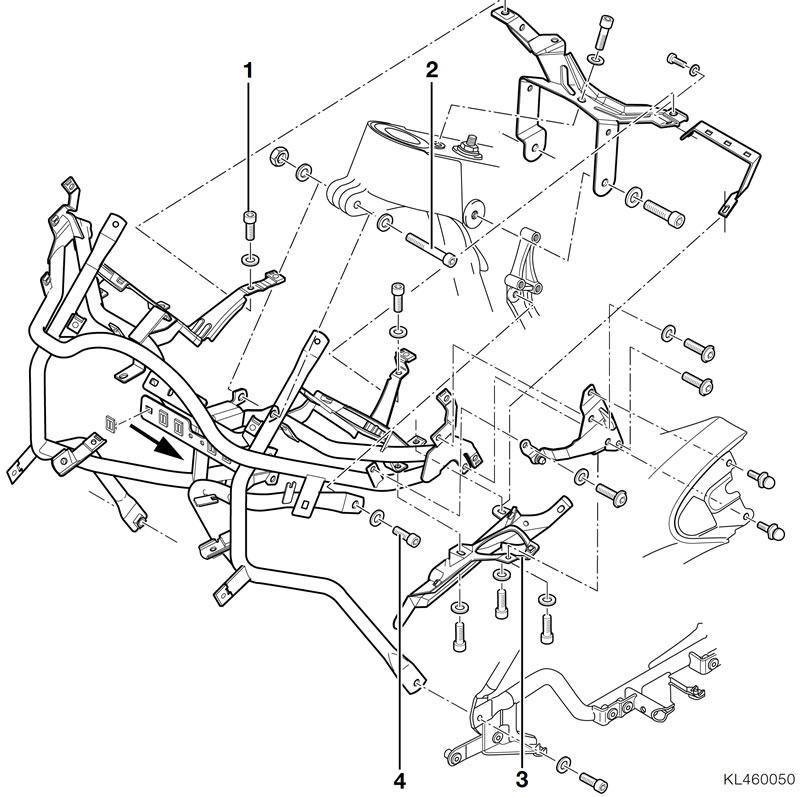
Removing rear mudguard
- Remove left and right side cases.
- Take out 3 screws (1, 2, 5).
- Pull the mudguard slightly toward the rear and remove.
- Installation is the reverse of the removal procedure: pay particular attention to the following.
- Replace seal on fastener (5).
- Remove left and right side cases.
