
Examination
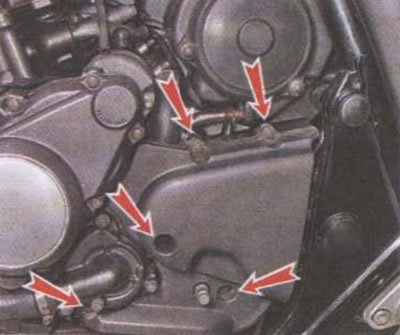
To check the drive sprocket, you must first remove its casing. To do this, use a 10 mm wrench to unscrew the five bolts securing the casing.
After removing the casing, we hang out the rear wheel of the motorcycle by placing it on the central stand and inspect the sprocket teeth by rotating the rear wheel. Teeth should not have chips, cracks, wear marks. If the teeth are damaged, the sprockets must be replaced.
Attention! It is recommended to replace the chain and sprockets as a set, since they burn in to each other during operation. Using an old chain and a new set of sprockets will result in increased wear.

External view of the new drive sprocket. The teeth are not worn and have the correct shape
Removing
1. We turn on the first gear, after which we remove the casing of the drive sprocket. We ask the assistant to lock the rear wheel by holding the rear brake pedal, and with a 14 mm wrench loosen the drive sprocket bolt.
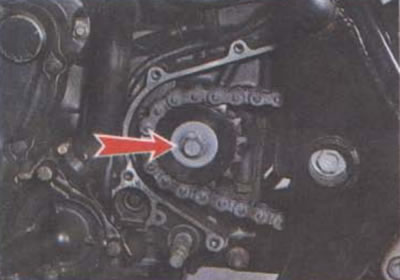
2. Weaken the chain tension and remove the drive chain from the sprocket (see «Drive chain - replacement»), after which we finally unscrew the bolt securing the drive sprocket and remove the sprocket.

Installation
We install the drive sprocket in the reverse order.