
Removal
Drain the clutch fluid from the hydraulic system (page 10-4).
Remove the left rear view mirror.
Disconnect the clutch switch connectors.

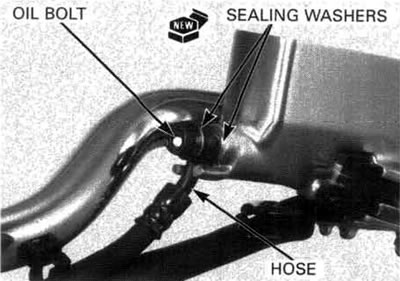
Remove the clutch hose oil bolt, sealing washers and clutch hose.

When removing the oil bolt, cover the end of the hose to prevent contaminations.
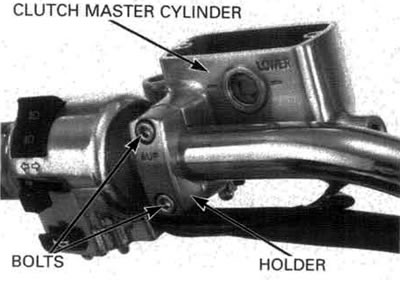
Remove the bolts, holder and clutch master cylinder assembly.
Disassembly
Remove the pivot nut, bolt and clutch lever assembly.

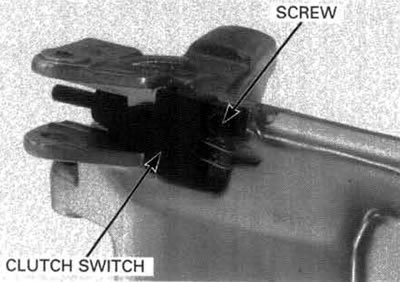
Remove the screw and clutch switch.
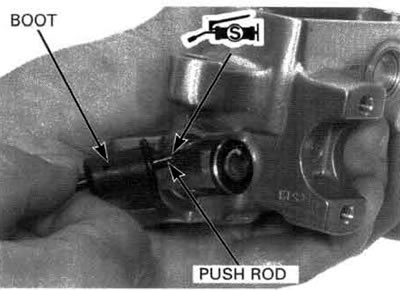
Remove the boot and push rod.

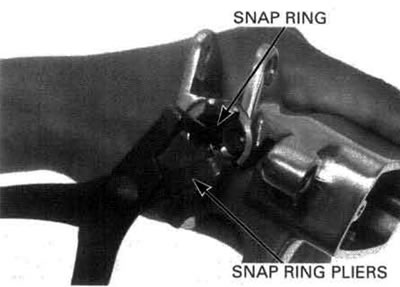
Remove the snap ring from the master cylinder body using the specified tool.
TOOL: Snap ring pliers 07914-SA50001.
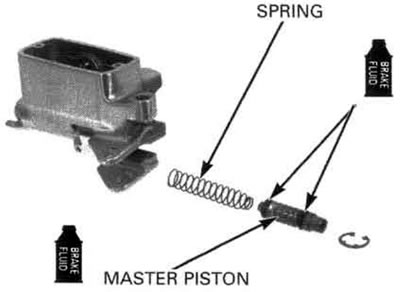
Remove the master piston and spring.
Clean the inside of the cylinder and reservoir with clean brake fluid.

Inspection
Check the piston boot, primary cup and secondary cup for fatigue or damage.
Check the master cylinder and piston for abnormal scratches.
Measure the master cylinder I.D.
Service limit: 12.76 mm (0.502 in).

Measure the master piston O.D.
Service limit: 12.65 mm (0.498 in).

Assembly
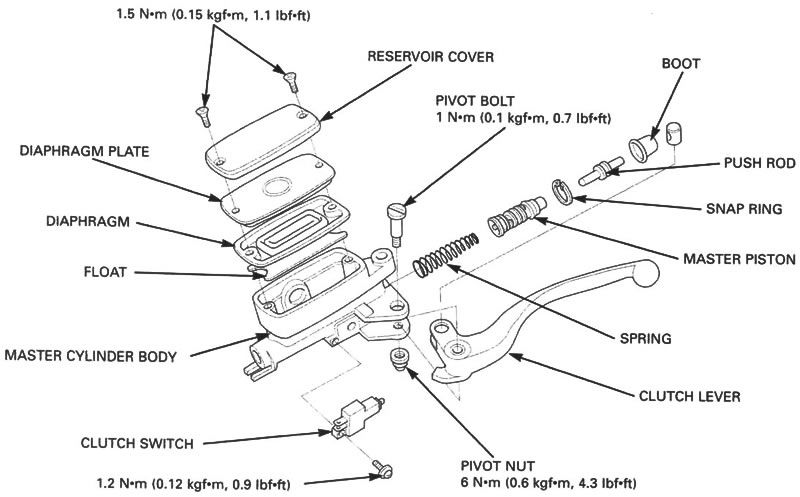
Coat all parts with clean DOT 4 brake fluid.
Dip the piston in the brake fluid.
Install the spring into the master cylinder.
Install the piston assembly into the master cylinder.
Do not allow the piston cup lips to turn inside out.
Install the snap ring into the groove in the master cylinder.
Tool: Snap ring pliers 07914-SA50001.

Apply silicone grease to the inside of the boot and the tip of the push rod.
Install the push rod and boot.
Install the clutch switch and tighten the screw to the specified torque.
Torque: 1.2 N·m (0.12 kgf·m, 0.9 lbf·ft).

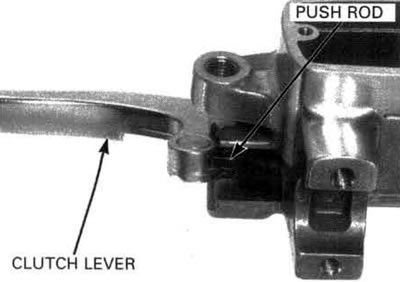
Apply silicone grease to the tip of the push rod, then install the clutch lever.
Apply silicone grease to the pivot bolt
Install and tighten the pivot bolt to the specified torque.
Torque: 1 N·m (0.1 kgf·m, 0.7 lbf·ft).
Hold the pivot bolt and tighten the pivot nut to the specified torque.
Torque: 6 N·m (0.6 kgf·m, 4.3 lbf·ft).

Installation
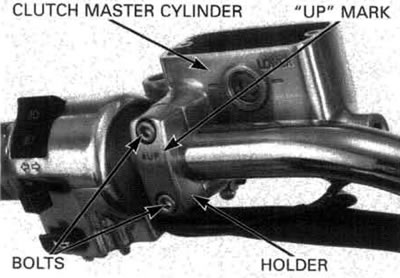
Place the master cylinder assembly on the handlebar. Align the end of the master cylinder with the punch mark on the handlebar.
Install the master cylinder holder with the "UP" mark facing up.
Tighten the upper bolt first, then the lower bolt.
Torque: 12 N·m (1.2 kgf·m, 9 lbf·ft).
Connect the clutch hose to the master cylinder with the clutch hose oil bolt and new sealing washers.
While pushing the clutch hose against the stopper, tighten the clutch hose oil bolt to the specified torque.
Torque: 34 N·m (3.5 kgf·m, 25 lbf·ft).
Connect the clutch switch connectors.
Install the rearview mirror.
Fill the reservoir to the upper level and bleed the hydraulic system (page 10-4).
