
Removal
Remove:
- Alternator Cover (see Alternator Cover Removal)
- Starter Idle Gear and Shaft
Wipe oil off the outer circumference of the rotor.
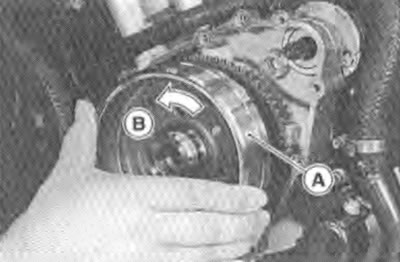
Hold the alternator rotor steady with the flywheel holder [A], and remove the rotor bolt [В].
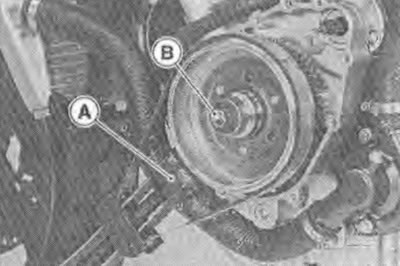
Special Tool - Flywheel Holder: 57001-1313
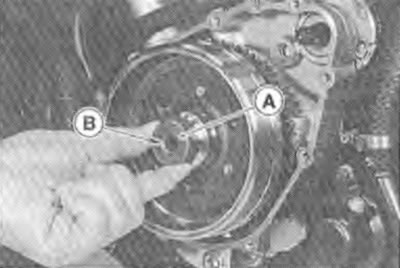
Using the flywheel puller [A], remove the alternator rotor from the crankshaft.
Special Tools - Flywheel Puller, M38x1.5: 57001-1405
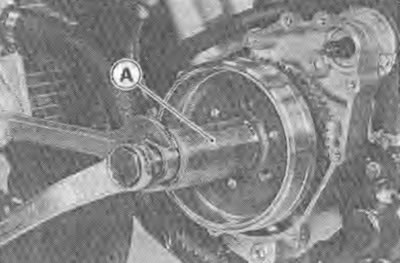
Caution! Do not attempt to strike the alternator rotor itself. Striking the rotor can cause the magnets to lose their magnetism.
Installation
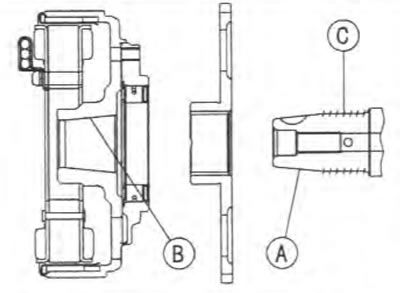
Using a cleaning fluid, clean off any oil or dirt on the following portions and dry them with a clean cloth.
- [A] Crankshaft Tapered Portion
- [B] Alternator Rotor Tapered Portion
Apply a thin coat of molybdenum disulfide grease to the crankshaft [С].
Install the starter gear [A], and washer [В].
Again, clean the crankshaft tapered portion [C] and dry there.
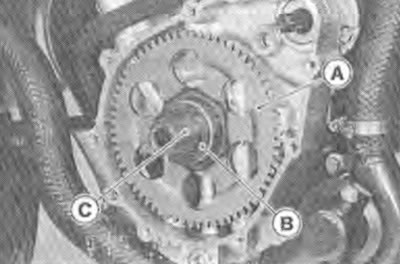
Install the alternator rotor [A] while turning [B] it counterclockwise.
Install the washer [A] so that the chamfer side [B] faces outward.
Note. Confirm the alternator rotor fit or not to the crankshaft before tightening it with specified torque.
Install the rotor and tighten it with 70 N·m (7 kg·m, 52 ft·lb) of torque.
Remove the washer and rotor bolt.
Check the tightening torque with rotor puller.
★ If the rotor is not pulled out with 20 N·m (2 kg·m, 15 ft·lb) of drawing torque, it is installed correctly.
★ If the rotor is pulled out with under 20 N·m (2 kg·m, 15 ft·lb) of drawing torque, clean off any oil dirt or flaw of the crankshaft and rotor tapered portion, and dry them with a clean cloth. Then, confirm that it is not pulled out with above torque.
Tighten the alternator rotor bolt while holding the alternator rotor steady with the flywheel holder.
Special tool - Flywheel Holder: 57001-1313
Torque - Alternator Rotor Bolt: 120 N·m (12.0 kg·m, 87 ft·lb)
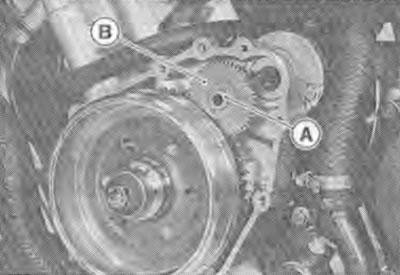
Apply a thin coat of molybdenum disulfide grease to the shaft [A], and install it and starter idle gear [В].
Install the alternator cover (see Alternator Cover Installation).