Pair hoses
- Remove the frame head covers. (9-6)
- Inspect the PAIR hoses for wear or damage.
- Inspect the PAIR hoses for secure connection.
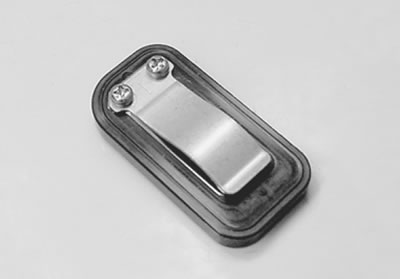
Pair reed valve
- Remove the fuel tank. (6-3)
- Remove the PAIR reed valve cover. (3-29)
- Inspect the reed valve for the carbon deposit.
- If the carbon deposit is found in the reed valve, replace the PAIR reed valve with a new one.
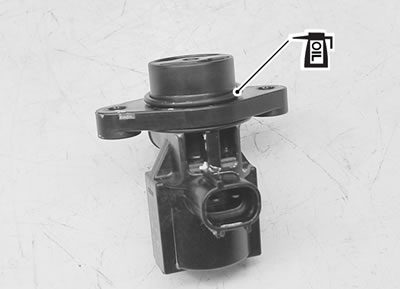
Pair control solenoid valve
Removal
- Remove the air cleaner chamber. (6-13)
- Remove the PAIR control solenoid valve 1.

Inspection
- Check that air flows through the air inlet port to the air outlet port.
- If air does not flow out, replace the PAIR control solenoid valve with a new one.
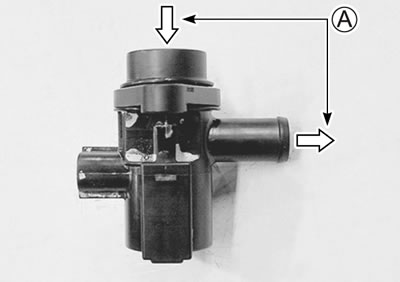
А. Air flow
- Connect the 12 V battery to the PAIR control solenoid valve terminals and check the air flow.
- If air does not flow out, the solenoid valve is in normal condition.
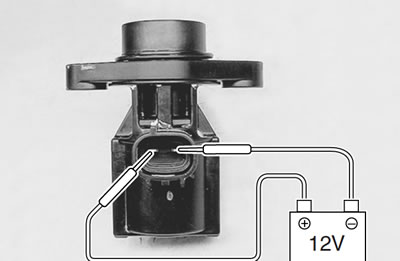
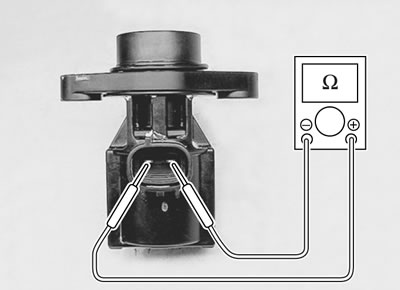
- Check the resistance between the terminals of the PAIR control solenoid valve.
- Resistance: 18 - 22 Ω at 20 - 30°C (68 - 86°F)
- 09900-25008: Multi-circuit tester set
- Tester knob indication: Resistance (Ω)
Installation
If the resistance is not within the standard range, replace the PAIR control solenoid valve with a new one.
Installation is in the reverse order of removal. Pay attention to the following points:
- Install the PAIR control solenoid valve to the air cleaner chamber.
- Apply thin coat of the engine oil to the new O-rings.
Caution: Replace the O-rings with the new ones.
- Connect the PAIR control solenoid valve lead wire coupler and PAIR hoses securely.
- PAIR system hose routing (12-8 and 12-9)