
Removal
Warning! Before starting work, ensure the motorcycle is stabilised and adequately supported. This will help prevent it from falling and causing injury to the operator or damage to the motorcycle.
Caution! To prevent paint damage, do not spill brake fluid onto any area of the bodywork. Spilled brake fluid will damage paintwork.
1. Disconnect the brake hose at the caliper and place the free end of the hose in a suitable container to collect any displaced brake fluid.
2. Remove the brake pads as described on page 15.11.
3. Remove the two caliper bolts.
4. Manoeuvre the caliper clear of the disc, taking care not to damage the wheel.
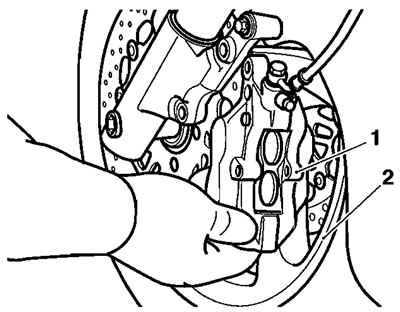
1. Caliper; 2. Wheel
Disassembly
Warning! Do not attempt to split the two halves of the caliper. A dangerous riding condition leading to loss of motorcycle control and an accident could occur if this warning is ignored.
Warning! To prevent injury, never place fingers or hands inside the caliper opening when removing the pistons. Always wear eye, hand and face protection when using compressed air. Eye, face and skin damage will result from direct contact with compressed air or brake fluid.
1. Cover the caliper opening with a clean, heavy cloth and, using either compressed air blown into the brake hose connection point, or by reconnecting the master cylinder and pumping the brake lever, remove each of the pistons, one at a time.
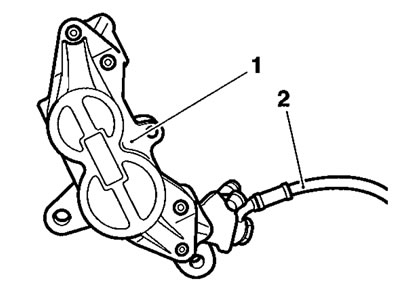
1. Caliper; 2. Fluid supply
Inspection
1. Check the pistons and caliper bores for corrosion, scoring and damage. Renew as necessary.
Warning! Always renew caliper seals and pistons after removal from the caliper. An effective hydraulic seal can only be made if new components are used. A dangerous riding condition leading to an accident could result if this warning is ignored.
2. Inspect the brake pads for damage and wear beyond the service limit. Renew as necessary.
Assembly
Warning! Never use mineral based grease in any part of the braking system or in any area where contact with the braking system is possible. Mineral based grease will damage the hydraulic seals in the calipers and master cylinders. A dangerous riding condition leading to loss of motorcycle control and an accident could result from use of mineral grease.
1. Fit new fluid seals to the piston bores in the caliper.

1. Caliper bore; 2. Fluid seal
Warning! Ensure that the bores do not become scratched during piston removal and assembly. Ensure that the pistons remain square to their bores during fitment, as incorrect fitment can lead to seal and bore damage. A dangerous riding condition leading to loss of control and an accident could result from damaged seals and/or bores.
2. Apply brake fluid to the outside of the caliper pistons and fluid seals.
3. Carefully push the pistons fully and squarely into the caliper bores by hand.
Installation
1. Position the caliper over the disc taking care not to damage the wheel.
2. Tighten the caliper bolts to 40 Nm.
3. Refit the brake pads as described on page 15.11.
4. Connect the brake hose to the caliper incorporating new sealing washers on each side of the union.
5. Tighten the brake hose union bolt to 25 Nm.
Warning!
- Use only DOT 4 specification brake fluid as listed in the general information section of this manual. The use of brake fluids other than those DOT 4 fluids listed in the general information section may reduce the efficiency of the braking system leading to loss of motorcycle control and an accident.
- Observe the brake fluid handling warnings given earlier In this section of the manual.
Caution! To prevent body damage, do not spill brake fluid onto any area of the bodywork. Spilled brake fluid will damage paintwork.
6. Fill the master cylinder with new, DOT 4 brake fluid from a sealed container.
7. Bleed the front brake line as described on page 15.9.
8. Check the operation of the front brake. Rectify as necessary.
Warning! It is dangerous to operate the motorcycle with defective brakes and you must have your authorised Triumph Dealer take remedial action before you attempt to ride the motorcycle again. Failure to take remedial action may reduce braking efficiency leading to loss of motorcycle control and an accident.