
Prepare
1. Remove main fuse. See Power disconnect.
2. Remove fuel tank. See Fuel tank.
Remove
1. See Figure 8-13. Disconnect left handlebar switch housing connector.
2. See Figure 8-14. Cut cable straps (3).
3. Remove switch housing.
- a. Remove screws (7).
- b. Remove lower switch housing (6).
- c. Remove upper switch housing (1).
Install
| FASTENER | TORQUE VALUE | |
| Handlebar switch housing screws, left | 0.8-1.1 Nm | 7-9 in·lbs |
1. See Figure 8-14. Install switch housing.
- a. Install edge of lower switch housing (6) into hand grip groove (5).
- b. Align pin (2) with hole (4). Install upper switch housing (1).
- c. Install screws (7). Tighten to 0.8-1.1 Nm (7-9 in·lbs).
2. See Figure 8-13. Connect left handlebar switch housing connector.
3. See Figure 8-14. Install new cable straps (3).
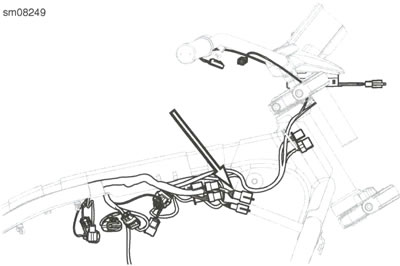
Figure 8-13. Left Handlebar Switch Housing Connector
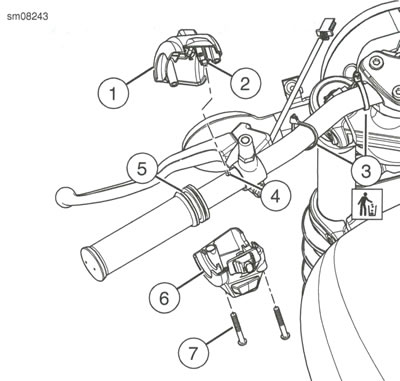
Figure 8-14. Left Hand Grip: 1. Upper switch housing; 2. Alignment pin; 3. Cable strap (2); 4. Alignment hole; 5. Tab; 6. Lower switch housing; 7. Screw (2)
Complete
1. Install fuel tank. See Fuel tank. 2. Install main fuse. See Power disconnect.
Warning: Be sure that all lights and switches operate properly before operating motorcycle. Low visibility of rider can result in death or serious injury.
3. Check operation of all lamps.