

Disassembly
1. Using a Phillips screwdriver, unscrew the three screws of the instrument panel casing.
2. Remove the casing of the instrument panel.
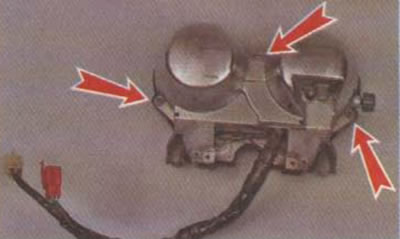
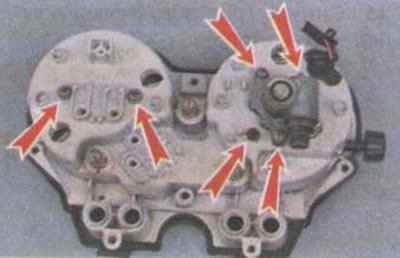
3. Using a Phillips screwdriver, unscrew the screws securing the instrument panel wiring harness. With a 10 mm wrench, unscrew the three nuts securing the instrument panel.
4. We remove the backlight from the mounting holes and remove the wiring harness. Remove the instrument panel mounting plate.

5. Using a Phillips screwdriver, unscrew the two screws securing the front of the instrument panel.

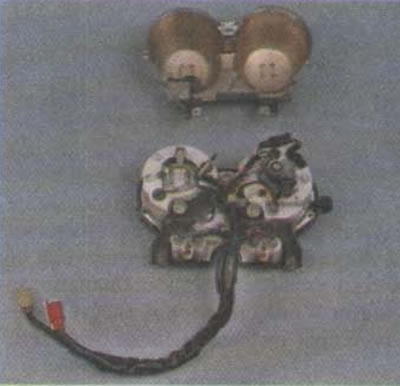
6. We remove the front part of the instrument panel and the diffusers of the control lamps.
7. Using a Phillips screwdriver, unscrew the screws securing the tachometer and speedometer gearbox.
Attention! When removing the speedometer and tachometer, you must be careful - the devices contain fragile parts that can be broken if handled carelessly.
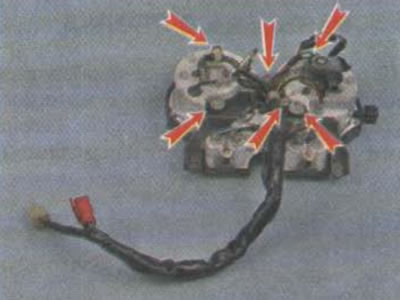
8. We dismantle the tachometer assembly with the engine temperature gauge from the dashboard housing and, using a thin Phillips screwdriver, unscrew the screw securing the handle for resetting the daily mileage readings.
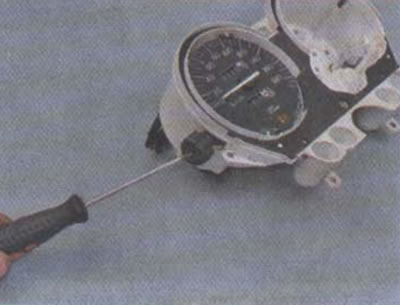
9. Remove the speedometer from the instrument panel housing.
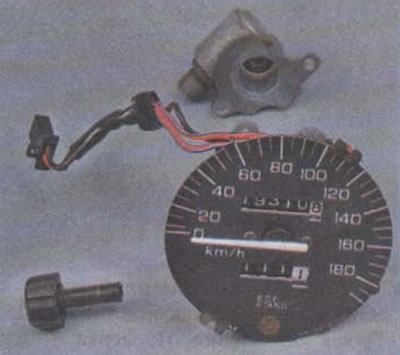
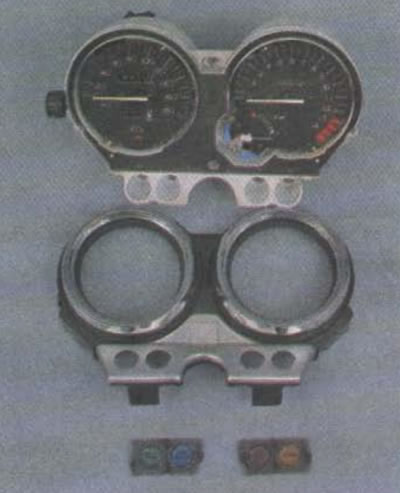
Speedometer and speedometer gearbox
10. Using a Phillips screwdriver, unscrew the two screws securing the engine temperature gauge and remove it from the tachometer scale.

Tachometer and engine temperature gauge | 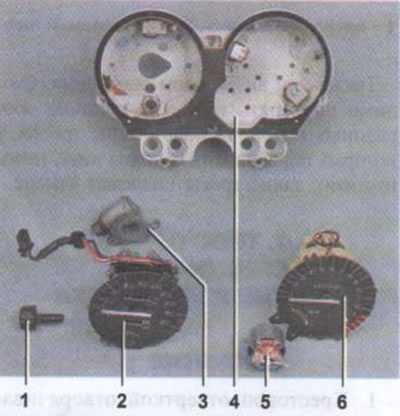
Dashboard details: 1 - daily mileage reset handle; 2 - speedometer; 3 - speedometer reducer; 4 - dashboard housing; 5 - engine temperature indicator; 6 - tachometer |
Assembly
We assemble and install the dashboard on a motorcycle in the reverse order.