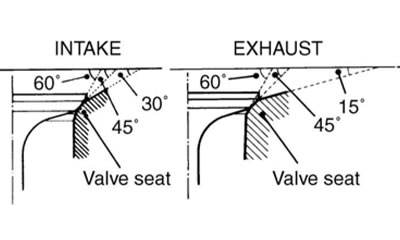
| INTAKE | EXHAUST | |
| 45° | N-615 or N-626 | N-615 or N-626 |
| 60° | N-211 | N-211 |
| 15° | N-615 | |
| 30° | N-626 |
Note: The valve seat contact area must be inspected after each cut.
- 09916-21111: Valve seat cutter set
- 09916-24210: Valve seat cutter (N-615)
- 09916-24480: Solid pilot (N-140-5.5)
- 09916-24810: Valve seat cutter (N-626)
- 09916-27710: Valve seat cutter (N-211)
- Insert the solid pilot with a slight rotation. Seat the pilot snugly. Install the 45° cutter, attachment and T-handle.
- Using the 45° cutter, descale and clean up the seat with one or two turns.
- Inspect the seat by the previously described seat width measurement procedure. If the seat is pitted or burned, additional seat conditioning with the 45° cutter is required.
Note: Cut only the minimum amount necessary from the seat to prevent the possibility of the tappet shim replacement.

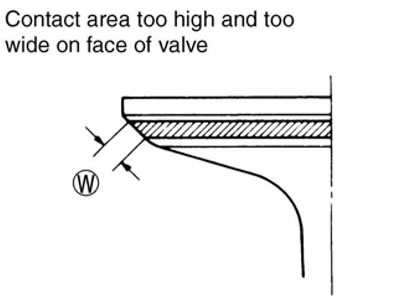
If the contact area is too high on the valve, or if it is too wide, use the 15760° cutters (for exhaust side) and 30760° cutters (for intake side) to lower and narrow the contact area.
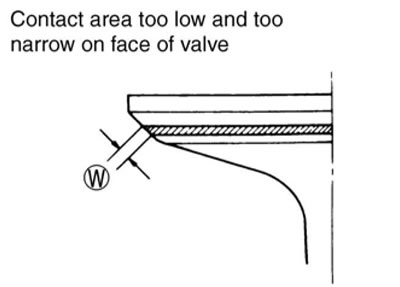
If the contact area is too low or too narrow, use the 45° cutter to raise and widen the contact area.
- After the desired seat position and width is achieved, use the 45° cutter very lightly to clean up any burrs caused by the previous cutting operations.
Caution: DO NOT use lapping compound after the final cut is made. The finished valve seat should have a velvety smooth finish and not a highly polished or shiny finish. This will provide a soft surface for the final seating of the valve which will occur during the first few seconds of engine operation.

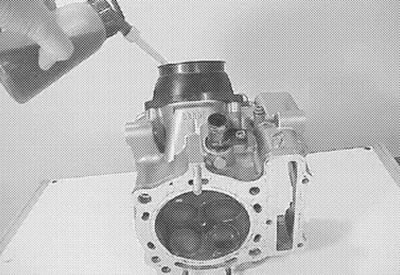
- Clean and assemble the head and valve components. Fill the intake and exhaust ports with gasoline to check for leaks. If any leaks occur, inspect the valve seat and face for burrs or other things that could prevent the valve from sealing.
Warning: Always use extreme caution when handling gasoline.
Note: After servicing the valve seats, be sure to check the tappet clearance after the cylinder head has been reinstalled. (2-8)