Rebound Damping Force Adjustment
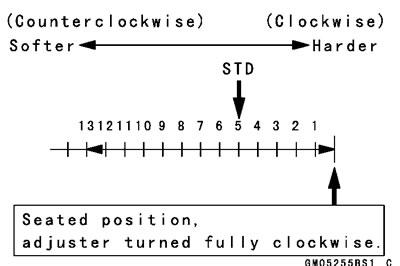
- To adjust the rebound damping force, turn the rebound damping adjuster [A] until you feel a click.
The standard adjuster setting for an average-build rider of 68 kg (150 lb) with no passenger and no accessories is the 5th click (white mark position) from the 1st click of the fully clockwise position.
Rebound Damping Force Adjustment
| Adjuster Position | Damping Force | Setting | Load | Road | Speed |
| 13 | Weak | Soft | Light | Good | Low |
| ↑ | ↑ | ↑ | ↑ | ↑ | ↑ |
| ↓ | ↓ | ↓ | ↓ | ↓ | ↓ |
| 0 | Strong | Hard | Heavy | Bad | High |
Spring Preload Adjustment
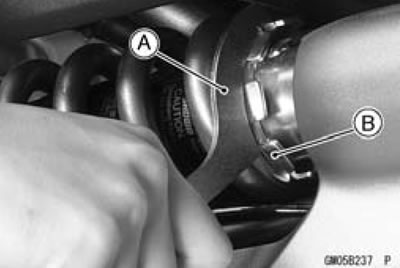
- Using the hook wrench [A], turn the adjusting nut [B] to adjust the spring preload.
Owner's Tool - Hook Wrench, R37.5: 92110-1144
The standard adjuster setting for average-build rider of 68 kg (150 Ib) with no passenger and no accessories is 5th position.
Spring Preload Setting
Standard Position: 5th position
Adjustable Range: 1st-7th position
- If the compression of the spring is not suited to the operating conditions, adjust it to an appropriate position by referring to the table below.
Spring Preload Adjustment
| Adjuster Position | Damping Force | Shock Absorber Hardness | Load | Road Conditions | Driving Speed |
| 1st | Weak | Soft | Light | Good | Low |
| ↑ | ↑ | ↑ | ↑ | ↑ | ↑ |
| ↓ | ↓ | ↓ | ↓ | ↓ | ↓ |
| 7th | Strong | Hard | Heavy | Bad | Highway |
Rear Shock Absorber Removal
Remove:
- Right Rear Frame Cover (See Rear Frame Cover Removal in the Frame chapter)
- Muffler Body (See Muffler Body Removal in the Engine Top End chapter)
- Raise the rear wheel off the ground with jack.
Special Tools - Jack: 57001-1238
Jack Attachment: 57001-1608
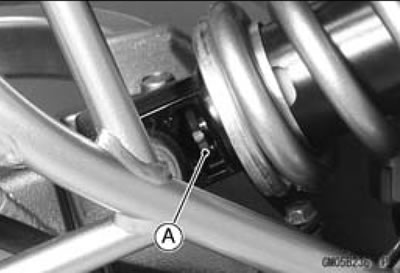
- Squeeze the brake lever slowly and hold it with a band [A].
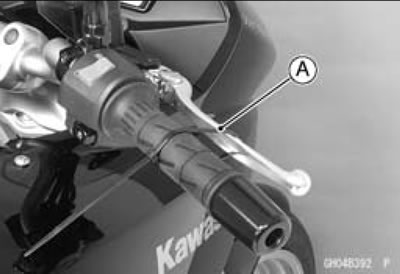
Warning: Be sure to hold the front brake when removing the shock absorber, or the motorcycle may tall over. It could cause an accident and injury.
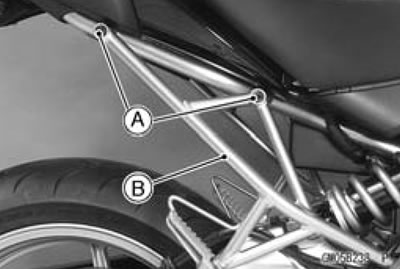
Remove:
- Bolts [A]
- Right Rear Footpeg Stay [B]
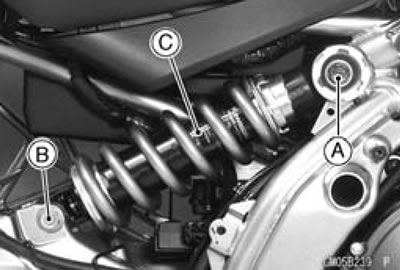
Remove:
- Upper Rear Shock Absorber Bolt [A]
- Lower Rear Shock Absorber Nut and Washer
- Lower Rear Shock Absorber Bolt [B]
- Remove the rear shock absorber [C] from backward.
Rear Shock Absorber Installation
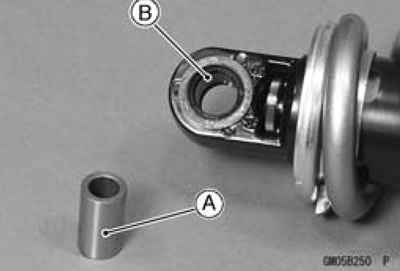
- Be sure to install the oil seals [A] to the rear shock absorber.
- Apply grease to the lip of the oil seals.
- Install the sleeve [B].
- Install the rear shock absorber so that the rebound damping adjuster [C] faces outward.
Tighten:
Torque - Rear Shock Absorber Bolt (Upper): 59 Nm (6.0 kgf·m, 44 ft·lb)
Rear Shock Absorber Nut (Lower): 59 Nm (6.0 kgf·m, 44 ft·lb)
- Install the right rear footpeg stay.
Torque - Rear Footpeg Stay Bolts: 25 Nm (2.5 kgf·m, 18 ft·lb)
- Install the removed parts (see appropriate chapters).
Rear Shock Absorber Inspection
- Remove the rear shock absorber (See Rear Shock Absorber Removal).
- Visually inspect the following items.
Smooth Stroke
- Oil Leakage
- Crack or Dent
If there is any damage to the rear shock absorber, replace it.
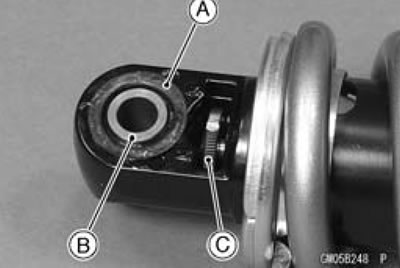
- Visually inspect the rubber bushing [A].
If it show any signs of damage, replace it.
- Visually inspect the shock absorber sleeve [A] and needle bearing [B].
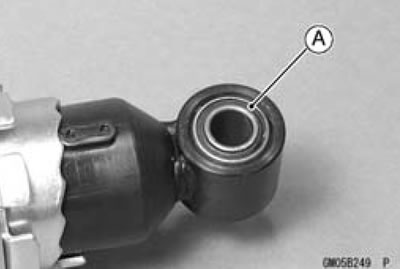
The roller in a needle bearing normally wear very little, and wear is difficult to measure. Instead of measuring, inspect the bearing in the shock absorber for abrasion, color change, or other damage.
If there is any doubt as to the condition of any of the needle bearing or sleeve, replace the sleeve, and needle bearing as a set.