Prepare
1. Remove engine. See Replace engine.
2. Remove starter. See Removing and installing starter.
3. Remove clutch. See Removing and installing clutch.
4. Remove cylinder head covers. SeeCylinder head covers.
5. Remove cylinder heads. See Cylinder heads.
6. Remove cylinders. See Removing and installing cylinders.
7. Remove balancer shaft. See Removing and installing balancer.
8. Remove output pulley. See Output pulley.
9. Separate crankcase. See Crankcase assembly.
Remove
1. Secure crankcase on a press with crank side facing up.
- a. Center main bearing under press.
2. Remove bearing using the appropriate pilot/driver.
Install
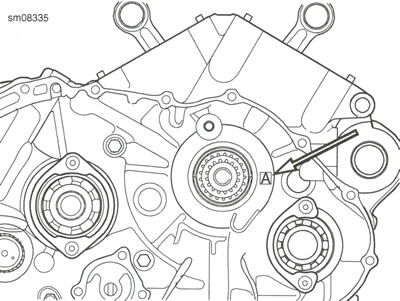
1. See Figure 4-49. Verify that new bearing is correct size. Refer to Table 4-26.
2. See Figure 4-48. Secure crankcase on a press with crank side facing up.
- a. Center main bearing bore under press.
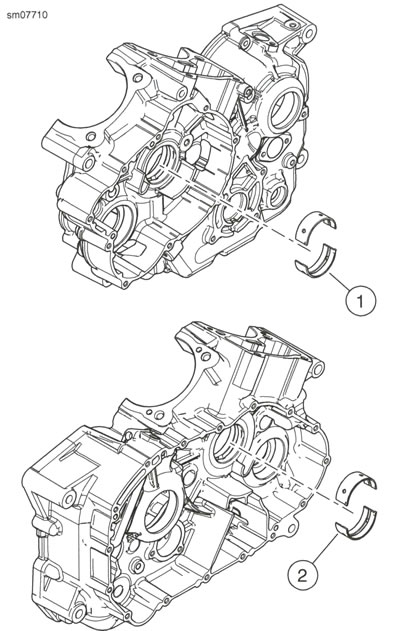
- b. Place seams of bearing within five degrees of horizontal. Proper orientation is shown for left main bearing (1) and right main bearing (2).
3. Press bearing into place using appropriate bearing installer.
Table 4-26. Main Bearing Grade Table
| CRANKCASE CODE | |||
| A | В | C | |
| Bearing Shell Color | Blue | Black | Red |

Figure 4-48. Crankcase Bearings: 1. Left main bearing 2. Right main bearing

Figure 4-49. Main Bearing Code
Complete
1. Join crankcase halves. See Crankcase assembly.
2. Install output pulley. See Output pulley.
3. Install balancer shaft. See Removing and installing balancer.
4. Install cylinders. See Removing and installing cylinders.
5. Install cylinder heads. See Cylinder heads.
6. Install cylinder head covers. See Cylinder head covers.
7. Install clutch. See Removing and installing clutch.
8. Install starter. See Removing and installing starter.
9. Install engine. See Replace engine.
