
Prepare
1. Remove negative battery cable. Power disconnect.
2. Drain engine oil. See Replace engine oil and filter.
3. Remove exhaust. See Exhaust system.
4. Remove right footrest and rear brake pedal assembly. See Rider foot controls.
5. Detach clutch cable from clutch cover. See Clutch control.
Remove
1. See Figure 4-33. Remove clutch cover.
- a. Remove screws (3).
- b. Remove clutch cover (2).
2. Discard gasket (1).
Install
| FASTENER | TORQUE VALUE | |
| Clutch cover screws | 10.0-12.0 Nm | 89-106 in·lbs |
1. See Figure 4-33. Install new gasket (1).
2. Install clutch cover.
- a. Install cable bracket (4).
- b. See Figure 4-34. Install screws. Tighten in order shown to 10.0-12.0 Nm (89-106 in·lbs).
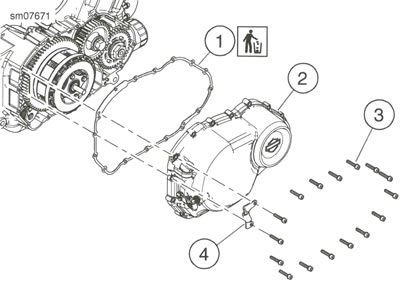
Figure 4-33. Clutch Cover: 1. Gasket 2. Clutch cover 3. Screws (16) 4. Cable bracket

Figure 4-34. Tightening Sequence
Disassemble
1. See Figure 4-35. Remove clutch actuator.
2. See Figure 4-36. Remove linkage assembly.
- a. Remove linkage assembly.
- b. Discard O-ring (2).
Assemble
1. See Figure 4-36. Insert linkage assembly.
- a. Install new O-ring (2) in groove (1).
- b. Slide linkage assembly shaft into clutch cover.
2. See Figure 4-37. Position spring end as shown.
3. See Figure 4-35. Insert clutch actuator. Rotate linkage assembly until actuator fits within cutout in shaft.
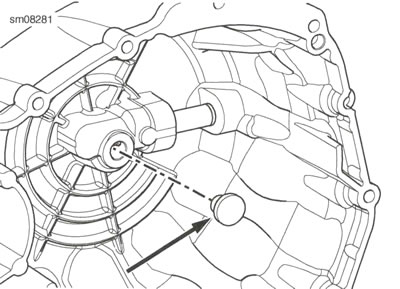
Figure 4-35. Clutch Actuator
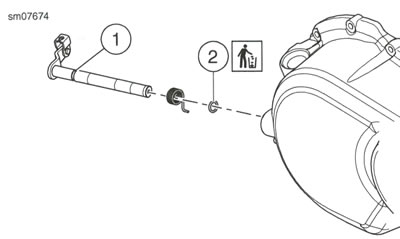
Figure 4-36. Clutch Linkage: 1. О-ring groove; 2. О-ring
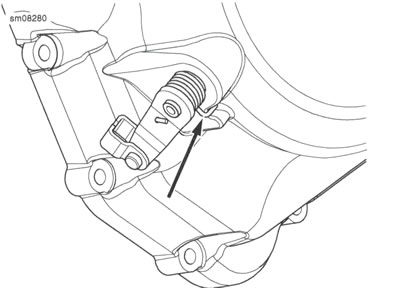
Figure 4-37. Spring End
Complete
1. Attach clutch cable to clutch cover. See Clutch cover.
2. Fill engine with oil. See Replace engine oil and filter.
3. Install right footrest and rear brake pedal assembly. See Rider foot controls.
4. Install exhaust. See Exhaust system.
5. Install negative battery cable. Power disconnect.