
Removal
Note: The complete thermostat housing can be removed without removing the thermostat itself.
Warning: The engine must be completely cool before carrying out this procedure.
1. The thermostat Is automatic in operation and should give many years service without requiring attention. In the event of a failure, the valve will probably jam open, in which case the engine will take much longer than normal to warm up. Conversely, if the valve jams shut, the coolant will be unable to circulate and the engine will overheat. Neither condition is acceptable, and the fault must be Investigated promptly.
XL600V and XRV750 models
2. Drain the cooling system (see Chapter 1). Remove the fuel tank (see Chapter 4).
3. On XL600V and XRV750-L to N (1990 to 1992 models) move aside the boot containing the wiring connectors as required (see illustration). On XRV750-P models onward (1993-on) remove the air filter housing (see Chapter 4), then disconnect all the wiring connectors in the bracket above the thermostat housing and draw them out of the bracket (see illustrations).
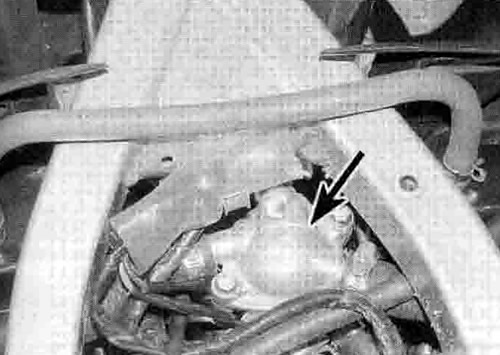
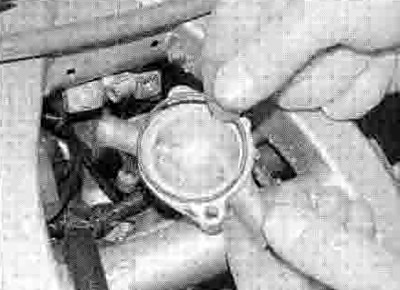
5.3a. On XL600V models move the wiring connector boot aside to access the thermostat housing (arrowed)
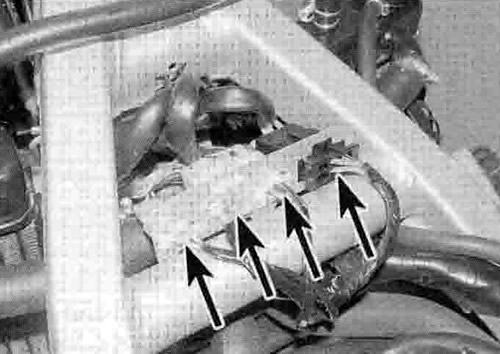
5.3b. On XRV750 models disconnect and withdraw the wiring connectors (arrowed)...

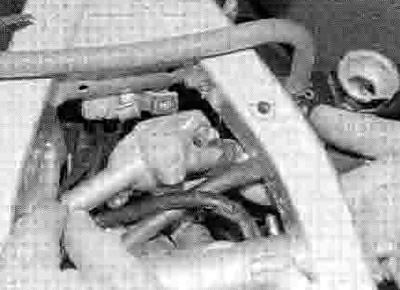
5.3c ...to access the thermostat housing (arrowed)
4. To remove the thermostat, slacken the clamps securing the coolant hoses to the thermostat cover and detach the hoses (see illustration). Unscrew the bolt securing the cover to the frame. Unscrew the two bolts securing the cover to the housing and separate it from the housing (see illustration). Discard the О-ring as a new one must be used. Withdraw the thermostat, noting the orientation of the bleed hole and how it fits (see illustration).

5.4a. Slacken the clamps and detach the hoses, then unscrew the bolts ...
5.4b ...remove the cover...

5.4c. and lift out the thermostat
5. To remove the thermostat housing, disconnect the coolant temperature sender wiring connector (see illustration 4.2a). Slacken the clamps securing all the hoses to the cover and housing and detach them, noting which fits where (see illustration 5.4a). Unscrew the bolt securing the cover to the frame and remove the housing.
XL650V models
6. Dram the cooling system (see Chapter 1). Remove the fuel tank (see Chapter 4). Remove the left-hand trim panel to access the thermostat housing (see illustrations 4.2b and c).
7. To remove the thermostat, disconnect the coolant temperature sender wiring connector (see illustration 4.2c) Unscrew the two bolts securing the cover to the housing, noting how they also secure it to the mounting bracket and separate the cover and housing. Discard the О-ring as a new one must be used. Withdraw the thermostat, noting how it fits.
8. To remove the thermostat housing, disconnect the coolant temperature sender wiring connector (see illustration 4.2c), Slacken the clamps securing all the hoses to the cover and housing and detach them, noting which fits where. Unscrew the bolt securing the housing bracket to the frame and remove the housing along with the bracket.
Check
9. Examine the thermostat visually before carrying out the test. If it remains in the open position at room temperature, it should be replaced with a new one.
10. Suspend the thermostat by a piece of wire in a container of cold water. Place a thermometer capable of reading temperatures up to 110°C in the water so that the bulb is close to the thermostat (see illustration) Heat the water, noting the temperature when the thermostat opens, and compare the result 3 with the Specifications given at the beginning of the Chapter. Also check the amount the valve opens after it has been heated for a few minutes and compare the measurement to the Specifications. If the readings obtained differ from those given, the thermostat is faulty and must be replaced with a new one.
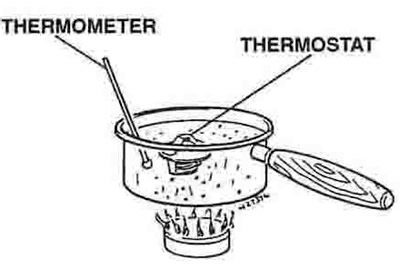
5.10. Thermostat testing set-up
11. In the event of thermostat failure, as an emergency measure only, it can be removed and the machine used without it (this is better than leaving a permanently closed thermostat in, but if it is permanently open, you might as well leave it in).
Note: Take care when starting the engine from cold as it will take much longer than usual to warm up. Ensure that a new unit is installed as soon as possible.
Installation
12. Installation is the reverse of removal, noting the following:
- Fit the thermostat with the bleed hole orientated as noted on removal, and make sure it locates correctly in the groove in the housing (see illustration 5.4c).
- Fit a new О-ring into the groove in the cover, using a dab of grease to keep it in place if required (see illustration). Tighten the cover and mounting bolts securely.
- Make sure all hoses are pushed fully onto their unions and secured by the clamps.
- Do not forget to connect the temperature sender wiring connector (see illustration 4.2a or c).
- Refill the cooling system (see Chapter 1).
5.12. Fit a new О-ring onto the cover