Disconnect the battery negative cable from the battery terminal.
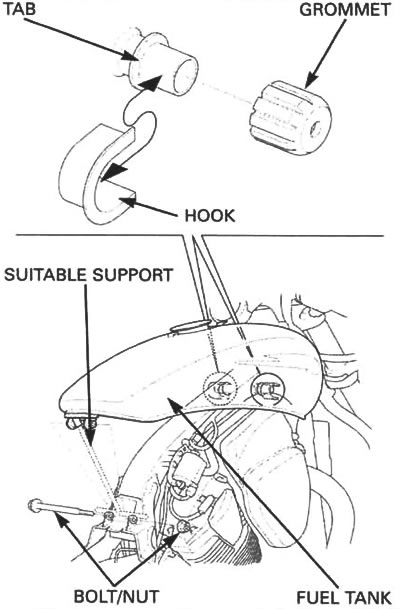
Open and support the rear end of the fuel tank (page 3-4).
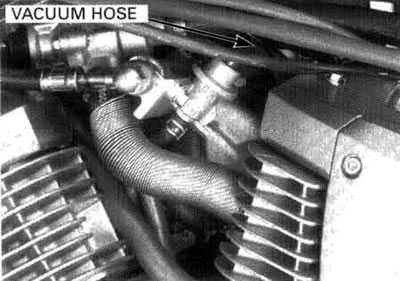
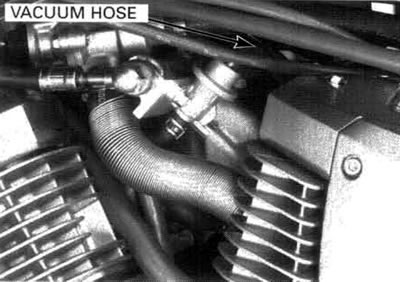
Disconnect the pressure regulator vacuum hose and plug the vacuum hose.
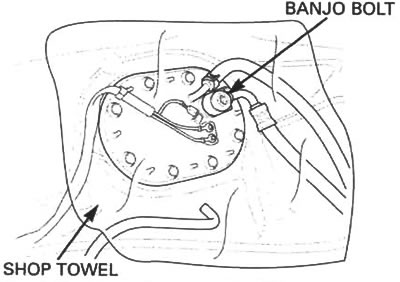
Cover the fuel hose banjo bolt with a shop towel.
Slowly loosen the fuel hose banjo bolt and catch the remaining fuel using a approved gasoline container.
Always replace the sealing washers when the fuel hose banjo bolt is removed or loosened.
Remove the fuel hose banjo bolt and attach the fuel pressure gauge with the following Honda genuine parts.
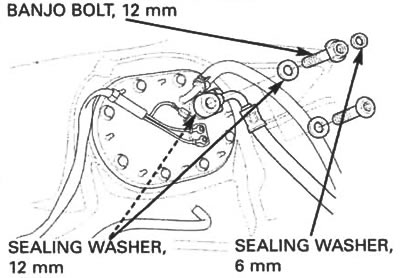
- Banjo bolt, 12 mm: Parts No. 90008-PD6-010
- Sealing washer, 12 mm: Parts No. 90428-PD6-003
- Sealing washer, 6 mm: Parts No. 90430-PD6-003
- Tool: Fuel pressure gauge 07406-004000A
Connect the battery negative cable.
Start the engine and let it idle.
Read the fuel pressure.

- Idle speed: 800±100 rpm
- Standard: 343 kPa (3.5 kgf/cm2, 50 psi)
If the fuel pressure is higher than specified, inspect the following:
- Pinched or clogged fuel return hose
- Pressure regulator
- Fuel pump (page 5-48)
If the fuel pressure is lower than the specified, inspect the following:
- Fuel line leaking
- Clogged fuel filter
- Pressure regulator
- Fuel pump (page 5-48)
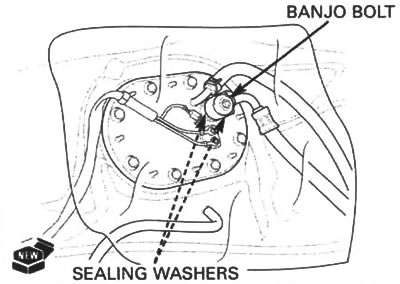
After inspection, remove the fuel hose banjo bolt and tighten the original fuel hose banjo bolt using the new sealing washers.
Torque: 22 N·m (2.2 kgf·m, 16 lbf·ft).
Always replace the sealing washers when the fuel hose ban/о bolt is removed or loosened.
Connect the pressure regulator vacuum hose.
Install the removed parts in the reverse order of removal.