
Inspection
Turn the ignition switch to "ON" and confirm that the fuel pump operates for a few seconds.

If the fuel pump does not operate, inspect as follows:
Open and support the front end of the fuel tank (page 3-4).
Disconnect the fuel pump 3P black connector.

Turn the ignition switch to "ON" and measure the voltage between the terminals.
Connection: Brown (+) - Green (-).
There should be battery voltage for a few seconds.
If there is battery voltage, replace the fuel pump.
If there is no battery voltage, inspect the following:
- Main fuse 30 A
- Sub fuse 10 A
- Engine stop switch (page 19-13)
- Engine stop relay (page 5-72)
- Fuel cut-off relay (page 5-50)
- Bank angle sensor (page 5-71)
- ECM (page 5-73)
Removal
Remove the fuel tank (page 5-50).
Remove the fuel pump mounting bolts.
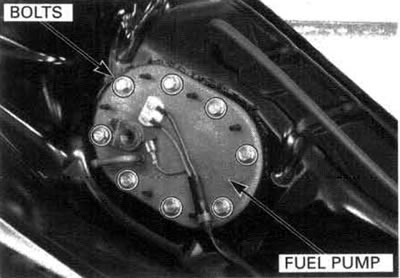
Always replace the sealing washers when the fuel hose banjo bolt is removed or loosened.
Remove the fuel tank (page 5-50).
Remove the fuel pump mounting bolts.
Always replace the sealing washers when the fuel hose banjo bolt is removed or loosened.
Remove the fuel pump assembly and packing.
Fuel filter replacement
Disconnect the fuel hoses from the fuel filter.
Remove the screw and fuel filter.
Install the fuel filter in the reverse order of removal.
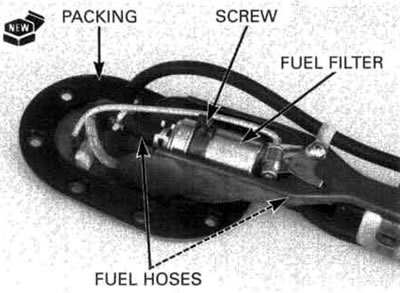
Note the direction of the fuel filter.
Installation
Place a new packing onto the fuel tank.
Install the fuel pump being careful not to damage the fuel pump wire.
Install and tighten the fuel pump mounting nuts in the sequence shown.
Torque: 12 N·m (1.2 kgf·m, 9 lbf·ft).
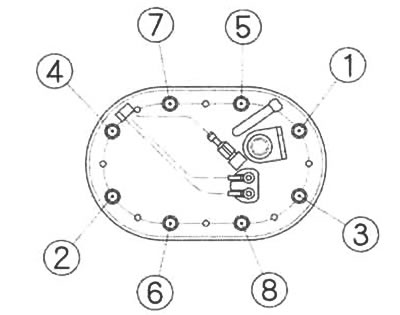
Always replace the packing with a new one.