
Construction
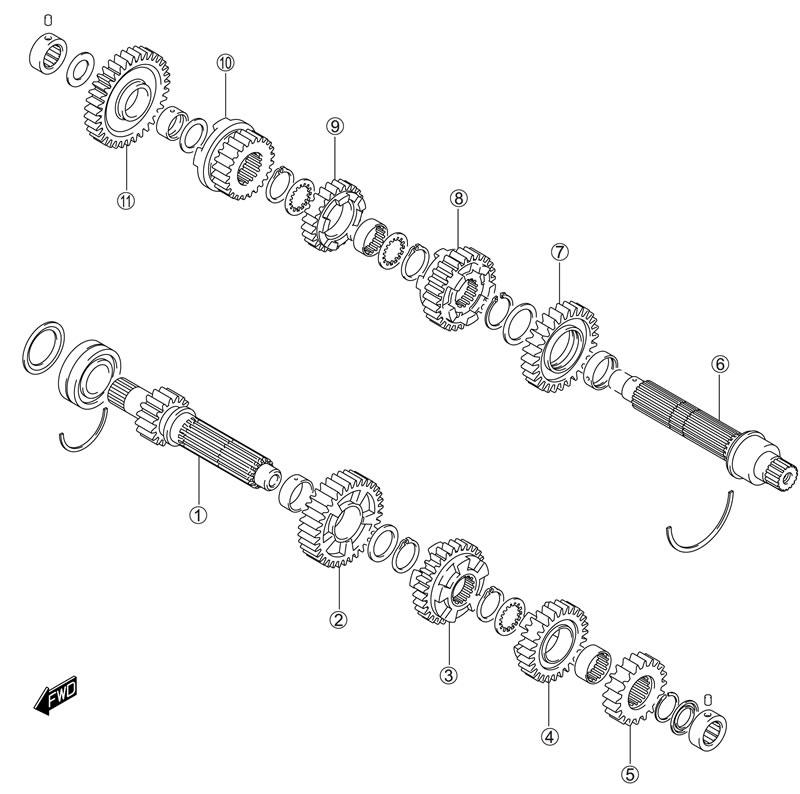
1. Countershaft/1st drive gear; 2. 5th drive gear; 3. 4th drive gear; 4. 3rd drive gear; 5. 2nd drive gear; 6. Driveshaft; 7. 2nd driven gear; 8. 3rd driven gear; 9. 4th driven gear; 10. 5th driven gear; 11. 1st driven gear
Disassembly
Caution: Be sure to identify each removed part as to its location, and lay the parts out in groups designated as "Drive" and "Driven", so that each will be restored to the original location during assembly.
Countershaft
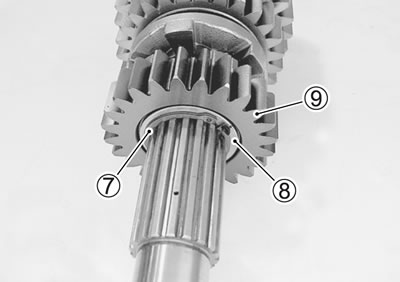
- Remove the bearing 1 and oil seal 2.
- Open the 3rd drive gear snap ring 3 from its groove and slide it towards the 4th drive gear 4 side.
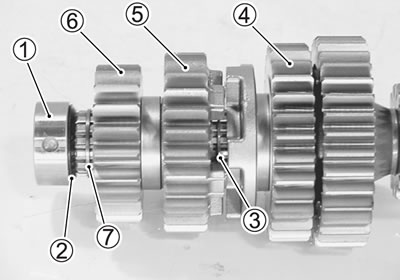
- Slide the 3rd 5 and 2nd 6 drive gears toward the 4th drive gear 4 side then remove the 2nd drive gear circlip 7.
- Remove the 2nd drive gear 8 and 3rd drive gear 9.
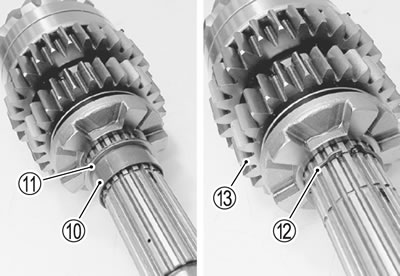
- Remove the 3rd drive gear bushing 10, washer 11, snap ring 12 and 4th drive gear 13.
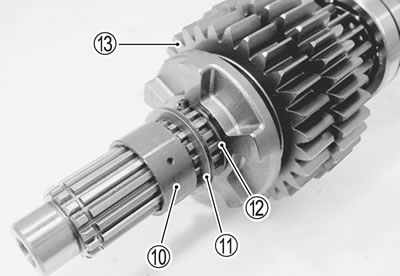
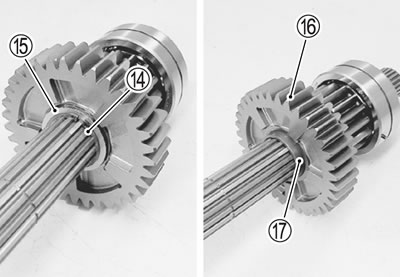
- Remove the snap ring 14, washer 15, 5th drive gear 16 and 5th drive gear bushing 17.
Driveshaft
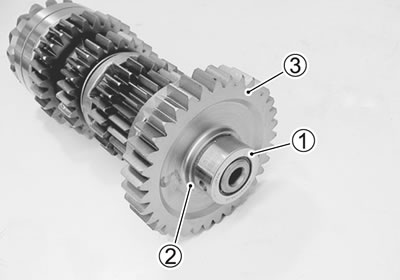
- Remove the bearing 1, washer 2 and 1st driven gear 3.
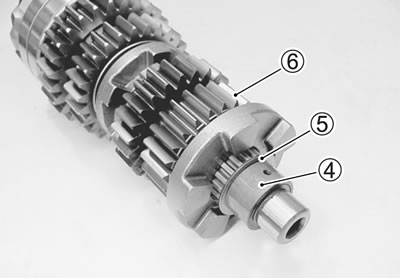
- Remove the 1st driven gear bushing 4, washer 5 and 5th driven gear 6.
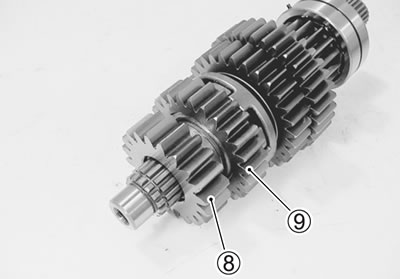
- Remove the snap ring 7, washer 8 and 4th driven gear 9.
- Remove the 4th driven gear bushing 10, washer 11, snap ring 12 and 3rd driven gear 13.
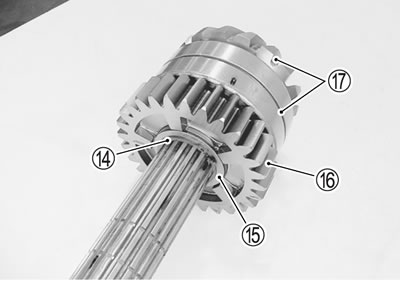
- Remove the snap ring 14, washer 15, 2nd driven gear 16 and its bushing.
- Remove the secondary drive gear with the bearing 17.
Caution:
- Do not attempt to disassemble the secondary drive gear and bearing assembly.
- The secondary drive gear and bearing is available only as an assembly.
Reassembly
Assemble the countershaft and driveshaft in the reverse order of disassembly. Pay attention to the following points:
Note:
- Rotate the bearings by hand to inspect for smooth rotation. Replace the bearings if there is anything unusual.
- Before installing the gears, apply engine oil to the driveshaft and countershaft.
- When installing the oil seal, apply SUZUKI SUPER GREASE "A" to it.
99000-25010: SUZUKI SUPER GREASE "A" or equivalent
Caution:
- Never reuse a snap ring. After a snap ring has been removed from a shaft, it should be discarded and a new snap ring must be installed.
- When installing a new snap ring, do not expand the end gap larger than required to slip the snap ring over the shaft.
- After installing a snap ring, make sure that it is completely seated in its groove and securely fitted.
Note: When reassembling the transmission, attention must be given to the locations and positions of washers and snap rings. The cross sectional view shows the correct position of the gears, bushings, washers and snap rings. (3-59)
- When installing a new snap ring, pay attention to its direction. Fit it to the side where the thrust is as shown in the illustration.
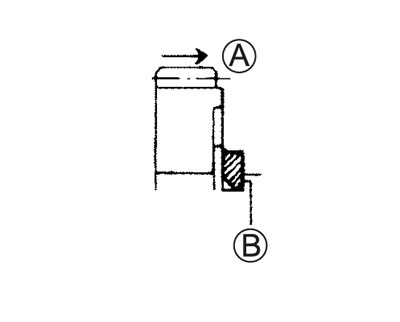
А. Thrust; В. Sharp edge
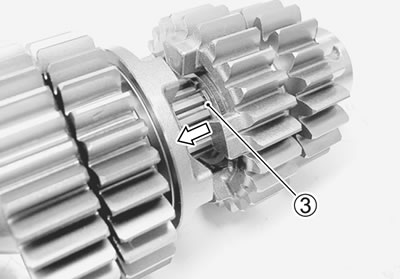
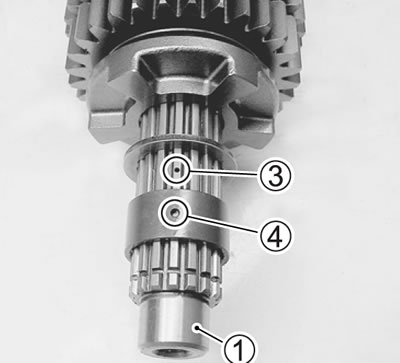
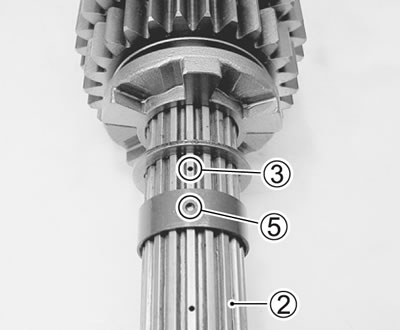
Caution: When installing the gear bushing onto the countershaft 1 and driveshaft 2, align the shaft oil hole 3 with the 3rd drive gear bushing oil hole 4 and 4th driven gear bushing oil hole 5.
Transmission parts location
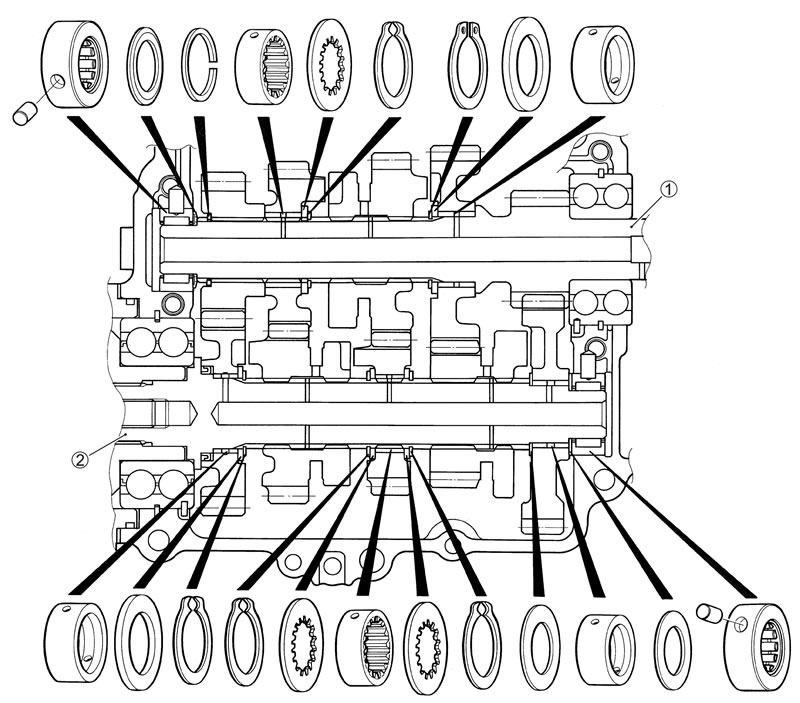
А. Countershaft; В. Driveshaft