
Warning: Before starting work, ensure the motorcycle is stabilised and adequately supported. This will help to prevent it falling and causing injury to the operator or damage to the motorcycle.
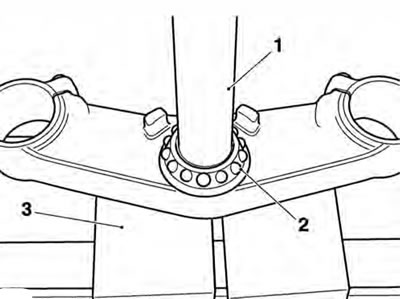
1. Remove both forks (see page 13-5).
Caution: Care must be taken when removing the headstock top nut, to ensure that the top nut and headstock do not become scratched. Protect the surfaces with a suitable cloth or tape to prevent scratching.
2. Remove the headstock top nut.
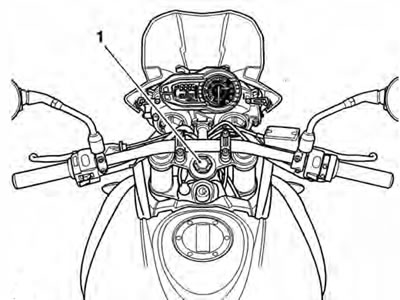
1. Headstock top nut
3. As an assembly, raise the top yoke and handle bars until clear of the steering stem. Rest the assembly forward of the steering stem such that access to the adjustment nuts is unrestricted. Ensure the master cylinder remains in an upright position.
4. Using tool T3880023, remove the locknut and tab washer. Discard the tab washer.
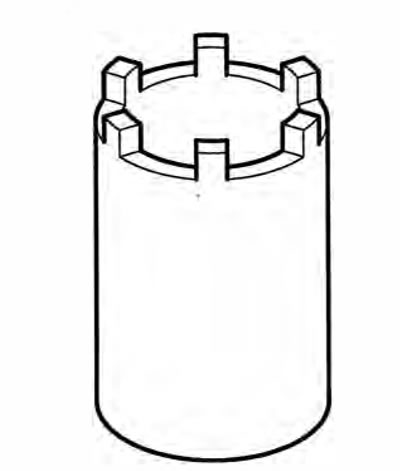
Tool T3880023
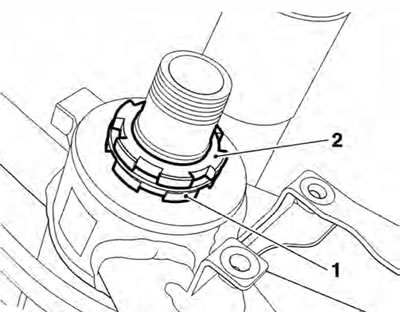
1. Adjuster nut; 2. Locknut
5. Using the same tool, remove the adjuster nut.
6. Remove the bearing cover and dust seal.
7. Remove the bottom yoke from below the frame headstock.
Warning: Always wear eye, hand and face protection when using a hammer and drift. Use of a hammer and drift can cause bearings to fragment. Pieces of fragmented bearing could cause eye and soft tissue injuries if suitable protective apparel is not worn.
8. Using a suitable drift, evenly and progressively drive the bearing races from the frame headstock.
9. Remove the inner race and dust seal from the bottom yoke using a press or puller.
Inspection
Warning: Only remove raised witness marks from within the frame. Removal of material below any raised areas will reduce the level of interference between the frame and the bearings. Loss of interference could cause the bearing to become loose in the frame leading to loss of motorcycle control and an accident.
1. Examine the frame for any raised witness marks caused by the removal process. Remove any such marks with fine emery paper or a gentle file.
Installation
1. Fit a new dust seal to the steering stem on the bottom yoke.
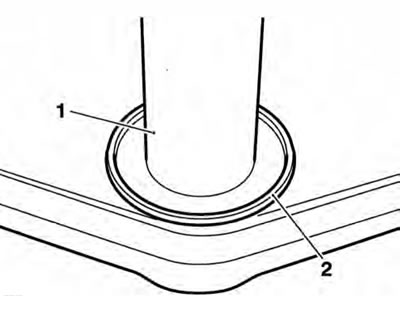
1. Steering stem; 2. Dust shield
Caution: Protect the threads of the bottom yoke when using a press or puller as damaged threads may mean replacing the yoke completely.
2. Press a new lower bearing inner race onto the steering stem of the bottom yoke.
1. Bearing; 2. Bottom yoke; 3. Press bed
3. Evenly and progressively drive a new complete upper bearing into the frame headstock.
4. Lubricate the lower bearing using multi-purpose grease.
5. Drive a new lower outer bearing into the frame headstock.
6. Lubricate the upper bearing using multi-purpose grease.
7. Insert the lower yoke to the frame, fit the upper bearing and race.
8. Fit a new upper dust seal and bearing cover, and retain with the adjuster nut.
9. Adjust the headstock bearings (see page 13-15).
10. Locate the upper yoke to the steering stem. Install but do not fully tighten the headstock top nut at this stage.
11. Fit the forks (see page 13-6).
12. Tighten the headstock top nut to 90 Nm.
13. Check that no freeplay exists in the headstock bearings. Adjust as necessary (see page 13-15).