
Check
1. Raise and support the front of the motorcycle.
Warning: Before starting work, ensure the motorcycle is stabilised and adequately supported. This will help prevent it from falling and causing injury to the operator or damage to the motorcycle.
Checking Headstock Bearing Adjustment
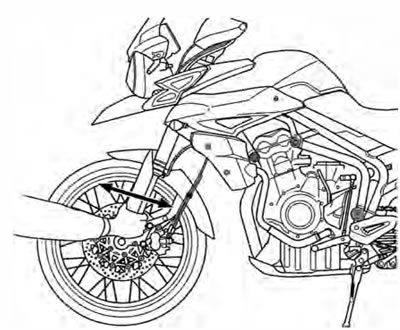
2. Hold the lower end of the front forks as illustrated and 'rock' with a front-to-rear motion. If free play can be detected, the headstock bearings require adjustment.
Adjustment
Warning: Always return the handlebars and risers to their original position as noted in paragraph.
1. Note the original position of the handlebars, and orientation of the adjustable risers, in order that they can be returned to the same position when the repair operation is complete.
2. Raise and support the front of the motorcycle.
3. Release the fixings securing the handlebar clamps to the risers, detach the clamps and release the handlebar.
4. As an assembly, raise the handle bars until clear of the top yoke. Rest the assembly forward of the steering stem such that access to the headstock top nut and the adjustment nuts is unrestricted. Ensure the master cylinder remains in an upright position.
5. Slacken the top yoke clamp bolts.
Warning: If the lower yoke fixings are also slackened, the forks will no longer support the weight of the motorcycle. Do not slacken the lower yoke fixings as, in this condition, the motorcycle could topple over causing damage and/or risk of injury.
Caution: Care must be taken when removing the headstock top nut, to ensure that the top nut and top yoke do not become scratched. Protect the surfaces with a suitable cloth or tape to prevent scratching.
6. Slacken the headstock top nut.
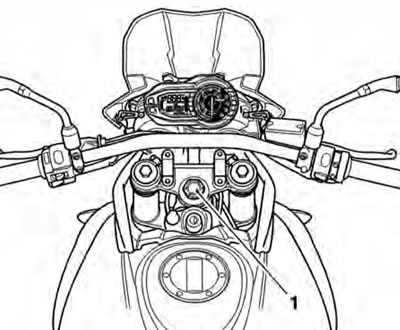
1. Headstock top nut
7. Ease the top yoke from the forks and support while detached.
8. Adjust the bearing free-play as follows, all using tool T3880023:
- Remove the locknut and tab washer.
- Slacken the adjuster nut then tighten to 40 Nm.
- Slacken the adjuster nut, then re-tighten to 15 Nm.
- Fit the tab washer and lock nut
Warning: lt is essential that the adjuster nut is not over-tightened. If the adjuster is over-tightened it will cause a pre-load on the headstock bearings. This will introduce tight steering, which could cause loss of control and an accident. Hold the adjuster nut in position while tightening the locknut to 40 Nm.
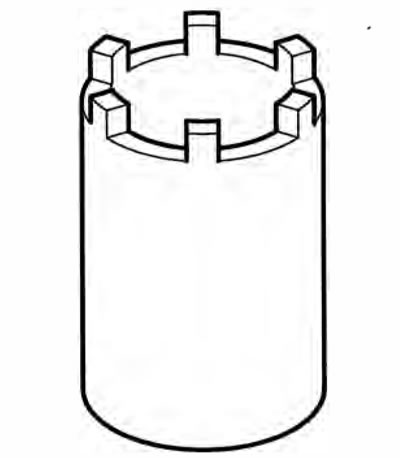
Tool T3880023
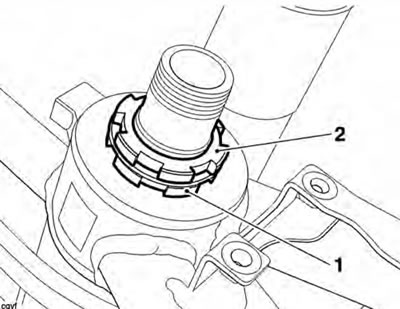
1. Adjuster nut; 2. Locknut
9. Refit the top yoke assembly to the forks.
10. Tighten the top nut to 90 Nm.
11. Tighten the top yoke clamp bolts to 20 Nm.
12. Locate the handlebar assembly in the lower halves of the clamps. Fit the upper clamps and 10 mm bolts.
13. Rotate the handlebar so that the etched centre (longer) marking on the handlebar aligns with the split line on the upper damps/risers.
14. Tighten the 10 mm bolts to 35 Nm.
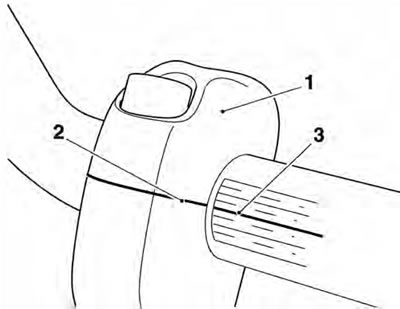
1. Upper clamp; 2. Clamp split line; 3. Centre marking
15. Refit the 8 mm bolts to the and tighten to 26 Nm.
16. Recheck the bearing adjustment (see page 13-15).