
Drainage
Note:
- Prior to disassembly of the coolant hoses, note the orientation and position of the hose clips to help ensure that they are returned to the same positions and orientation on assembly.
- Early models have a bleed screw fitted to the radiator top hose. The bleed screw was removed shortly after the start of production and a straight hose (without a bleed screw) was introduced. As a result, the bleed procedure is slightly different depending on the type of top hose fitted.
1. Models with a top hose bleed screw: Position the motorcycle on level ground on the sidestand.
2. Models without a top hose bleed screw: Position the motorcycle on level ground a paddock stand.
3. Remove the rider's seat (see page 16-13).
4. Disconnect the battery, negative (black) lead first.
Warning: Do not remove the coolant pressure cap when the engine is hot. When the engine is hot, the coolant inside the radiator is hot and also under pressure. Contact with the pressurised coolant will cause scalds and skin damage.
5. Remove the lower radiator panels (see page 16-14).
6. Remove the upper radiator panels (see page 16-14).
7. Remove the coolant pressure cap on the radiator.
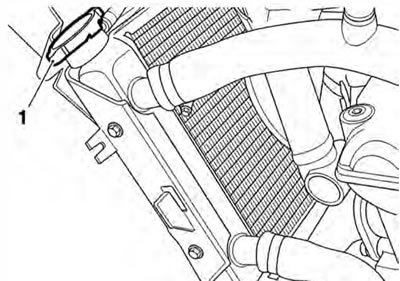
1. Radiator Cap
8. Position a container to collect the displaced coolant.
9. Slacken the clip then release the bottom hose from the radiator and allow the coolant to drain.
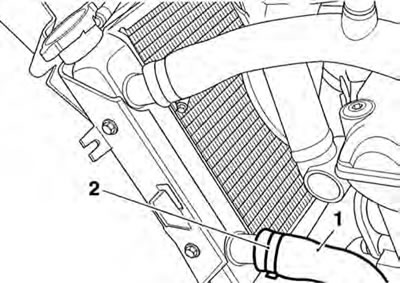
1. Bottom hose; 2. Ciip
10. Slacken the clip then release the heat exchanger hose from the heat exchanger and allow the coolant to drain.
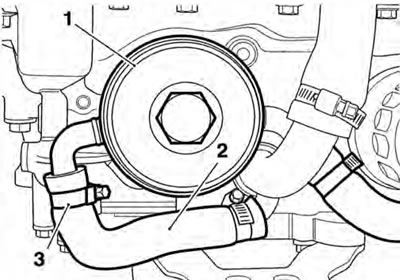
1. Heat exchanger; 2. Heat exchanger hose; 3. Coolant hose clips
Filling
1. Reconnect the bottom hose and tighten the hose clip to 2 Nm.
2. Reconnect the heat exchanger hose and tighten the hose clip to 2 Nm.
3. Remove the bleed screw from the right hand side of the radiator.
1. Bleed screw
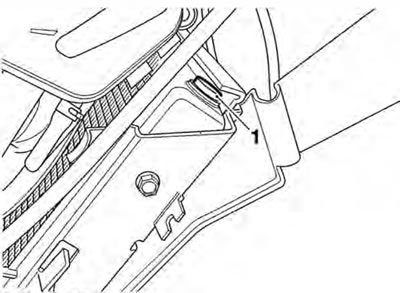
4. If fitted, remove the bleed screw from the top hose.
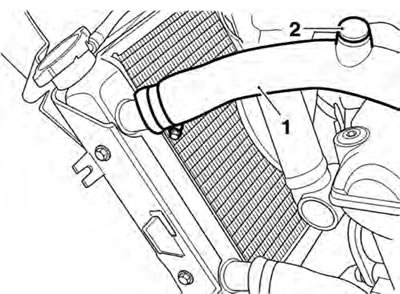
1. Top hose; 2. Bleed screw (if fitted)
Note: During filling, squeezing the bottom hose with both hands will help to pump coolant around the system and remove trapped air.
5. Slowly add coolant mixture to the system, throughthe filler opening in the radiator, until the system is full.
6. If the system has filled correctly and fully, there should be coolant visible through the:
- radiator bleed screw openi ng;
- -top hose bleed screw opening (if fitted);
- radiator filler opening.
7. If there is no coolant visible through the radiator bleed screw opening, but the filler side appears to be full, attach a length of clear tubing to the radiator bleed screw spigot and syphon coolant into the bleed screw side of the radiator.
Note: A hand operated vacuum pump or similar should be used to syphon the coolant through the system.
8. If necessary, top up the system through the filler and refit the pressure cap.
9. Install the radiator bleed screw and tighten to 1.5 Nm.
10. If fitted, install the top hose bleed screw and tighten to 1 Nm.
11. With the aid of an assistant, lean the motorcycle fully over to the right hand side, and then the left hand side, to release air trapped in the cooling system. Repeat as necessary.
12. Reconnect the battery, positive (red) lead first.
13. Start the motorcycle and allow to run for approximately 20 to 30 seconds. Briefly raise the engine speed several times to allow any air to be expelled from the system.
14. Stop the engine. Check and top up the coolant level as necessary.
15. With the aid of an assistant, lean the motorcycle fully over to the right hand side, and then the left hand side, to release air trapped in the cooling system.
16. Start the motorcycle. Briefly raise the engine speed several times to allow any air to be expelled from the system.
17. Allow the engine to run until the cooling fan operates.
18. Stop the motorcycle and allow the engine to cool.
Warning: Do not remove the coolant pressure cap when the engine is hot. When the engine is hot, the coolant inside the cooling system is hot and also under pressure. Contact with the pressurised coolant will cause scalds and skin damage.
19. Check and top up the coolant level as necessary.
20. Refit the upper radiator panels (see page 16-14).
21. Refit the lower radiator panels (see page 16-14).
22. Check the expansion tank level and top up if necessary.
23. Refit the rider's seat (see page 16-13).
Water Pump
Note: The oil pump and water pump are supplied as an assembly and cannot be separated. For additional information, refer to Oil Pump (see page 8-8 for removal and page 8-13 for installation).