
Removal
Note: The fuel pump and fuel filter is a sealed for life unit and must be replaced as a complete assembly.
1. Remove the rider's seat (see page 16-13).
2. Disconnect the battery, negative (black) lead first.
3. Remove the fuel tank (see page 10-91).
4. Drain the fuel tank into a suitable container.
Warning: Observe the warning advice given in the general information section on the safe handling of fuel and fuel containers. A fire, causing personal injury and damage to property, could result from spilled fuel or fuel not handled or stored correctly.
5. Invert the fuel tank and place on a protective surface to prevent paint damage.
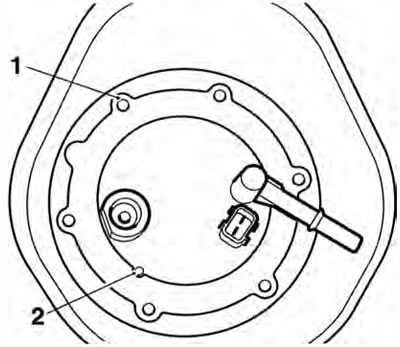
6. Remove the fixings securing the fuel pump mounting plate to the fuel tank.
1. Mounting plate; 2. Mounting plate fixings
7. Lift the fuel pump assembly and manoeuvre it from the fuel tank aperture.
8. Unhook the fuel level sender wiring from the hook on the fuel pump body.
9. Disconnect the fuel level sensor electrical connector and remove the fuel pump and filter assembly.
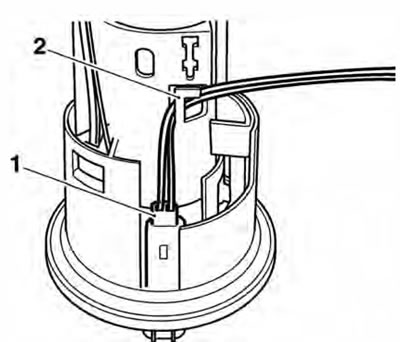
1. Fuel level sender connector; 2. Hook
10. Noting its orientation, remove and discard the sealing ring from the fuel pump assembly.

1. Fuel pump assembly; 2. Sealing ring location
Installation
1. Install a new sealing ring in the fuel pump assembly, with the seal lip facing uppermost, and ensure that it is correctly seated.
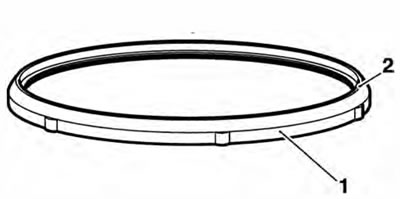
1. Sealing ring; 2. Seal lip
2. Taking care to ensure the sealing ring is not damaged or dislodged, manoeuvre the fuel pump assembly into the fuel tank aperture.
3. Reconnect the fuel level sensor electrical connector and hook the wiring behind the hook on the fuel pump body.
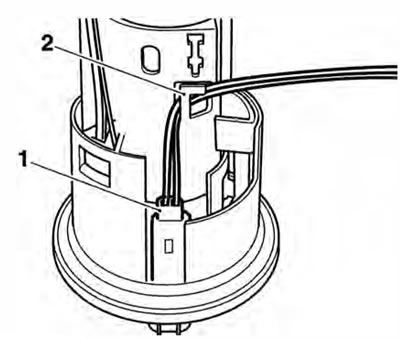
1. Fuel level sender connector; 2. Hook
Caution: Routing the fuel level sender wiring over the fuel level sender arm will prevent the sender arm from moving through its full range of movement, causing incorrect fuel gauge readings.
4. Check that the fuel level sender wiring is not routed over the fuel level sender arm.
5. Locate the fuel pump and filter assembly to the fuel tank.
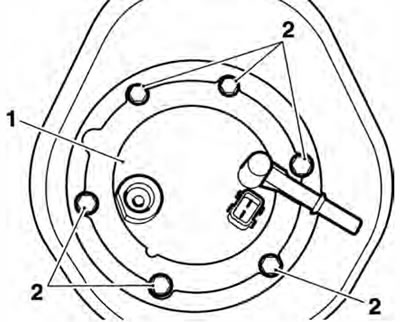
6. Ensure the locating peg on the fuel pump assembly is located in the cut out on the mounting plate and the offset hole is positioned as shown below.
1. Offset hole position; 2. Locating peg
7. In the sequence shown below, tighten the mounting plate fixings to 9 Nm.
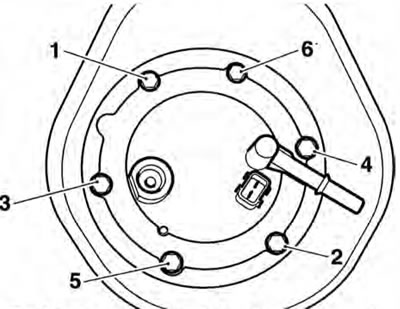
Fuel pump mounting plate torque sequence
8. Refit the fuel tank (see page 10-92)
9. Refill the fuel tank with the fuel drained earlier.
10. Reconnect the battery, positive
11. Start the engine and check carefully for fuel leaks. Rectify as necessary.
12. Refit the rider's seat (see page 16-13).