
Removal
Warning: Observe the warning advice given in the general information section on the safe handling of fuel and fuel containers. A fire, causing personal injury and damage to property, could result from spilled fuel or fuel not handled or stored correctly.
1. Remove the rider's seat (see page 16-13).
2. Disconnect the battery, negative (black) lead first.
3. Remove the lower radiator panels (see page 16-14).
4. Remove the upper radiator panels (see page 16-14).
5. Remove the cockpit assembly (see page 16-17).
6. Remove the fuel tank infill panels (see page 16-18).
7. Release the two bolts securing the fuel tank to the frame.
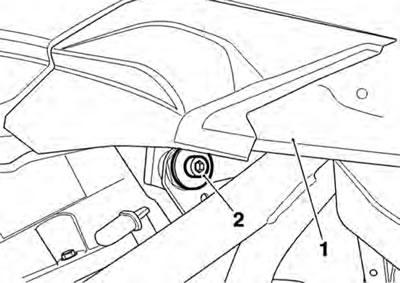
1. Fuel tank; 2. Fuel tank to frame bolt
8. Raise the fuel tank and disconnect the electrical connections to the fuel pump and the fuel level sensor.
Warning: When disconnected, the fuel tank is self-sealing but a small amount of fuel may escape causing clothing and components to be coated with fuel. This would represent a serious fire hazard which could lead to burn injuries and damage to property.
9. Ease the double check clip latch away from the connector until the release buttons are exposed.
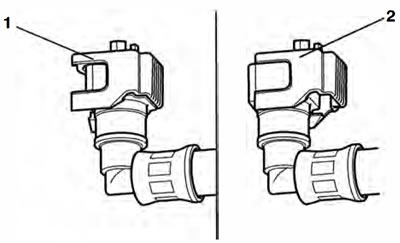
1. Locked Position; 2. Unlocked Position
10. Disconnect the fuel hose by squeezing the sides of the connector and pulling the hose free from its spigot on the fuel pump plate.
Note: Before disconnection, note the position of the two breather hoses so that they can be returned to the same locations when refitting the tank.
11. Disconnect the two breather hoses.
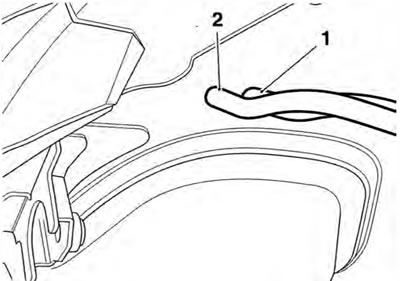
1. Breather hose - fuel tank vent; 2. Breather hose - filer neck over flow
12. Remove the fuel tank from the frame.
Installation
1. Position the fuel tank to the frame.
2. Connect the two breather hoses as previously noted.
Note: The fuel hose - has different coloured connectors on each end, to aid orientation. The grey end must be fitted to the fuel tank, the orange end must be fitted to the fuel rail.
3. Reconnect the fuel feed hose by gently pushing inwards until the hose engages with a click.
4. Slide the double check latch down (i.e. towards the spigot) until the release buttons are covered. If the latch will not slide into position, then the fuel hose is not fully home on its spigot and must therefore be refitted correctly.
5. Reconnect the fuel pump electrical connection.
6. Reconnect the fuel level sensor.
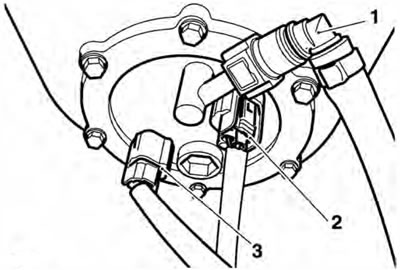
1. Fuel hose; 2. Fuel pump electrical connection; 3. Fuel level sensor connection
7. Align the fuel tank to the mounting points. Fit and tighten the two rear bolts to 12 Nm.
8. Refit the fuel tank infill panels (see page 16-21).
9. Refit the cockpit assembly (see page 16-21).
10. Refit the upper radiator panels (see page 16-21).
11. Refit the lower radiator panels (see page 16-21).
12. Reconnect the battery, positive (red) lead first.
13. Start the engine and check carefully for fuel leaks. Rectify as necessary.
14. Refit the rider's seat (see page 16-13).