
Removal
Note: Removal of the cylinder head is not possible with the engine in the frame.
1. Remove the engine from the frame (see page 9-3).
2. Remove the camshafts (see page 3-13).
3. Remove the camshaft drive chain (see page 3-18).
4. Remove the camshaft drive chain tensioner blades.
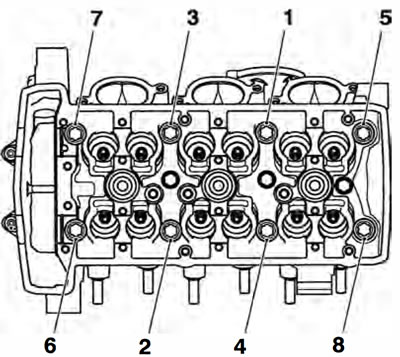
5. Note the position of all tappet buckets and shims such that they can be refitted in the same positions. Remove all the tappet buckets and shims.
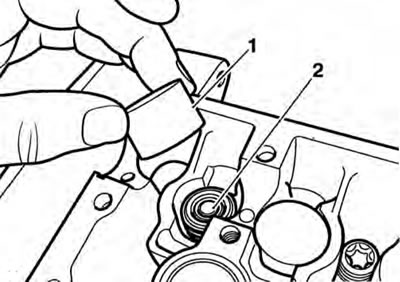
1. Tappet bucket; 2. Shim
Note: To prevent the tappet buckets and shims from becoming mixed, place the shim and tappet together in a marked container. The components must be refitted in their original positions.
6. Disconnect the coolant bypass hose from the rear of the cylinder head.
7. Release the screws securing the outside of the cylinder head to the upper crankcase.
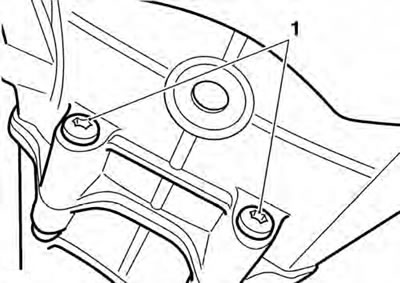
1. Cylinder head to upper crankcase screws
8. Progressively release the cylinder head bolts in the order shown below.
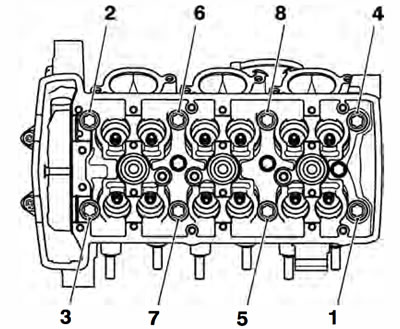
Cylinder Head Bolt Release Sequence
9. Lightly tap the cylinder head with a rubber mallet to break the seal of the gasket.
10. Remove the cylinder head. Discard the cylinder head bolts and gasket.
Inspection
1. Thoroughly clean the surface of the head and check for damage and pitting of the combustion chambers.
2. Using a straight edge, check the cylinder head gasket face for warp which could lead to gasket failure. Replace the head if warped.
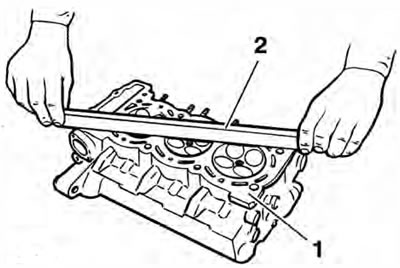
1. Cylinder head gasket face; 2. Straight edge
3. Check the camshaft drive chain tensioner blades. Renew if worn or damaged.
Installation
1. Thoroughly clean the upper faces of the crankcase, taking care not to damage the mating surfaces.
2. Fit a new cylinder head gasket ensuring that the head to crankcase location dowels are correctly in place.
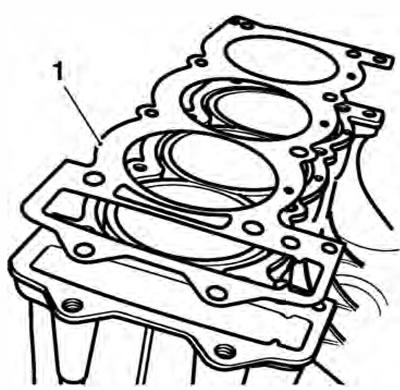
1. Cylinder head gasket
3. Ensure that the cylinder head face is completely clean.
4. Carefully lower the cylinder head over the camshaft drive chain and locate the head onto the dowels.
Caution:
- Using the correct procedure to fit and tighten the cylinder head bolts will ensure the long term reliability of the cylinder head gasket.
- Clean each new bolt, paying particular attention to the threads and under-bolt-head areas. If any of the threads or bolt-head areas are damaged, replace the bolt(s).
- Tighten the bolts using the three-stage procedure given below.
- Failure to observe these important items may lead to engine damage through a damaged head gasket.
5. Fit new bolts and washers to the head and tighten until finger tight.
6. The cylinder head bolts must be tightened in the following sequence:
Cylinder Head Bolt Tightening Sequence
7. The head bolts are finally tightened in three stages, all using the above sequence. This is to ensure that the cylinder head gasket seals correctly to the head and crankcase. The three stages are as follows:
Note: For stages A and B of the head bolt tightening operation, a torque wrench of known, accurate calibration must be used.
- A: Tighten the head bolts, in the sequence shown above, to 15 Nm.
- B: Tighten the head bolts in the sequence shown on the previous page, to 20 Nm. For the final torque operation, Stage C, (see below> which is carried out in the sequence shown on the previous page, a 'torque turn' method is used. The bolts must be turned through 120° to reach the final setting. To accurately gauge the 120° turn, use service tool 3880105-T0301 as follows:
- C: Fit the tool between the Torx socket and the drive handle and locate the Torx drive to the head bolt. Pick an increment point on the torque turn gauge which aligns with a suitable reference point on the head. Tighten the bolts until 12 of the 10°
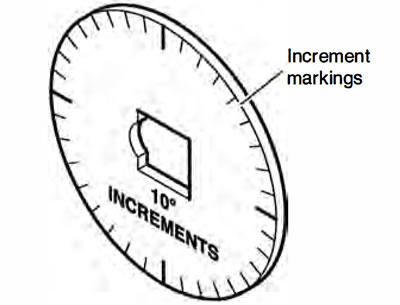
Tool T3880105-T0301
6. Fit the screws securing the side of the cylinder head to the crankcase and tighten to 10 Nm.
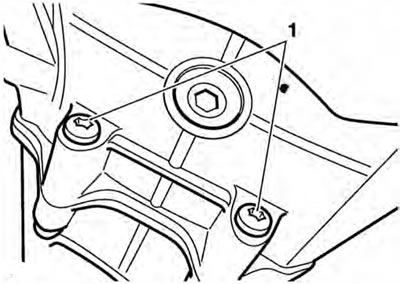
1. Cylinder head to upper crankcase screws
7. Install the camshaft drive chain tensioner blades. Install a new bolt to the front tensioner blade and tighten to 9 Nm.
8. Clean and lubricate the tappet buckets with a 50150 solution of engine oil and molybdenum disulphide grease and refit the buckets and shims in the same locations from which they were removed.
9. Refit the camshaft drive chain (see page 3-20).
10. Refit the camshafts (see page 3-15).
11. Install the engine to the frame (see page 9-5).